


OVERVIEW
An < iframe > (short for inline frame) is an HTML element that allows you to embed another HTML document within the current page. Introduced in 1998, an iframe is one of the oldest HTML tags. They are commonly used to display external content such as ads, maps, or videos or to create layered user interfaces by loading multiple web pages within a single page.
Modern web development libraries and frameworks like Angular and ReactJS also support iframes. Angular’s built-in security features, such as DomSanitizer, can be used to ensure that content loaded within an iframe is safe and secure.
In addition, to support the native HTML iframe tag, ReactJS also provides a built-in Reactiframe component, which is a wrapper around the HTML <iframe> tag.
<iframes> offer several benefits, such as the ability to embed external content like YouTube videos and tweets. Iframes can also be used to isolate content as the JavaScript and CSS of the parent page do not apply to iframe. Another excellent use case for iframes is for displaying advertisements.
With so many use cases for iframes, they are used in websites, and it remains important to be able to test web pages that contain iframes reliably. Not only simple single iframes but web pages that have nested iframes as well.
In this tutorial, we’ll explore how to handle iframes in Playwright, a popular browser automation and end-to-end web testing library. You will learn how to locate an iframe using Playwright locators and how Playwright can handle nested iframes.
In addition to running all the tests to handle iframes in Playwright locally, you will also see how they can be run on a Playwright cloud grid provider.
What is Playwright?
Playwright is an open-source browser automation and end-to-end testing framework released by Microsoft in 2020. Playwright API is available for programming languages such as JavaScript, TypeScript, Python, Java, and .Net.
It also supports all modern browsers, such as Chrome, Firefox, Microsoft Edge, and Safari, making cross browser testing feasible. In addition to being cross-browser, Playwright is cross-platform, which means that tests can be run on Windows, macOS, and Linux either in headless or headed mode.
Calculate SHA1 hashes easily with our SHA1 hash calculator tool
Some key features of Playwright
Playwright provides several key features that set it apart from other automation testing frameworks. Here are some of the key features of Playwright:
- Browser Context
Playwright creates a browser context for each test. Browser context is equivalent to a brand-new browser profile. This delivers full test isolation with zero overhead. Creating a new browser context only takes a handful of milliseconds.
- Log in once
Playwright helps save the authentication state of the context and reuse it in all the tests. This bypasses repetitive log-in operations in each test yet delivers full isolation of independent tests.
- Powerful Tooling
Provides tools such as codegen, which generates tests by recording actions. These tests can be generated in any language. Traceviewer helps capture all test execution information to investigate and debug test failures.
- Auto-Wait & Retry
Playwright waits for elements to be actionable before performing actions. It also has a rich set of introspection events. Combining these two eliminates the need for setting artificial timeouts and reduces the flakiness of tests.
All these combined features make Playwright a comprehensive, feature-packed browser automation and end-to-end testing framework.
What are iFrames and how to use them?
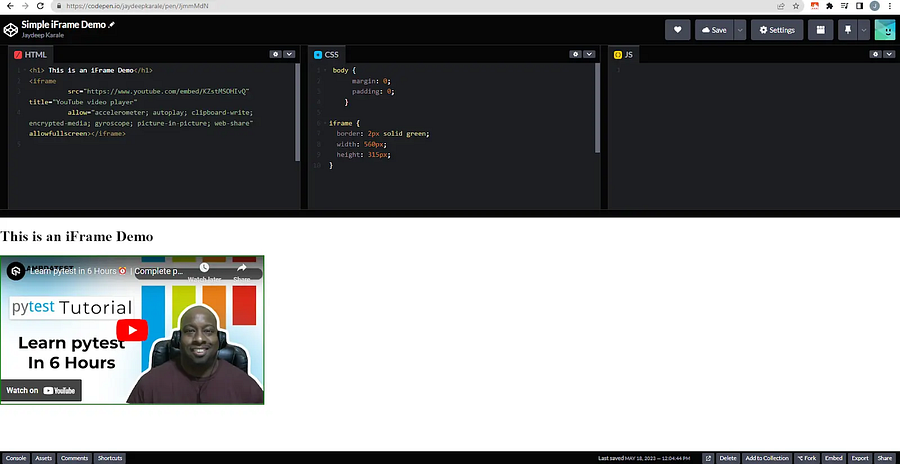
Iframes provide a convenient way to embed content from other websites on our website. An iframe can be created using the HTML <iframe> tag in the body of the page. Let’s see how to embed a YouTube video as an iframe using CodePen.
YouTube provides the code to embed videos into iframe directly.
Head over to the YouTube page of the video you wish to embed into your web page as an iframe and click the Share button.
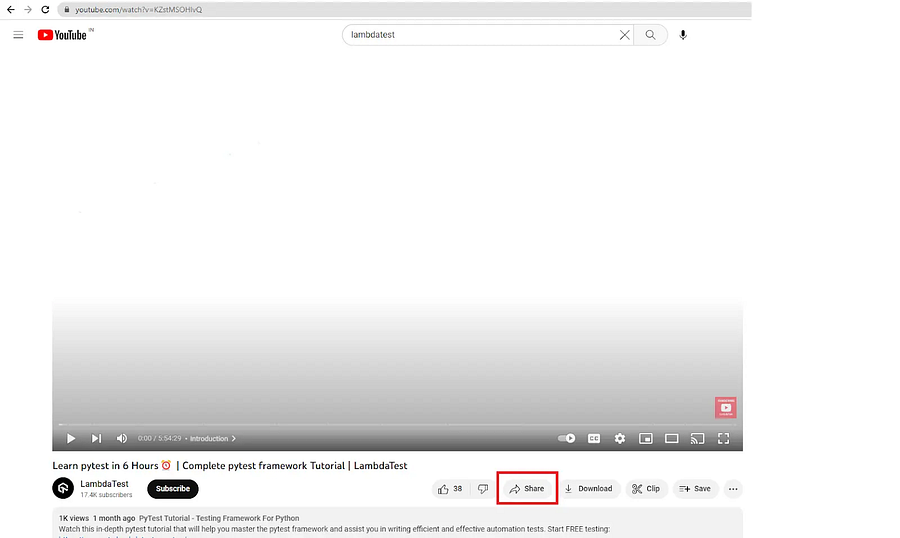
On the menu that appears, click the “Embed” button.
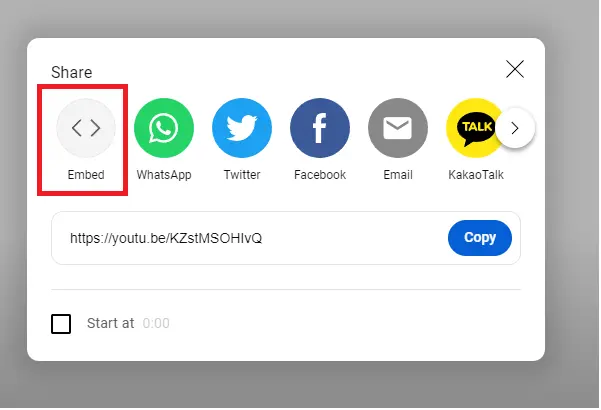
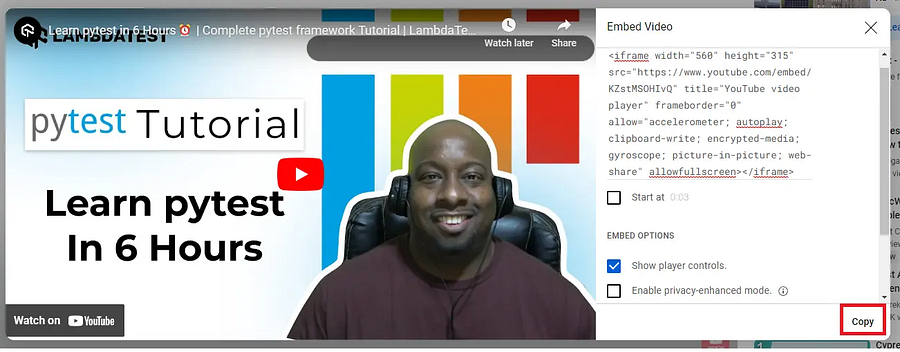
The <iframe> code snippet is available to copy & paste into your webpage. Like most websites that allow embedding, YouTube also allows customization of the embedding link, and based on the selection, the link to embed the video will be altered.
For example, if you click the ‘Start at’ checkbox and give a custom time, the “src” in the <iframe> tag will be amended with the start time.
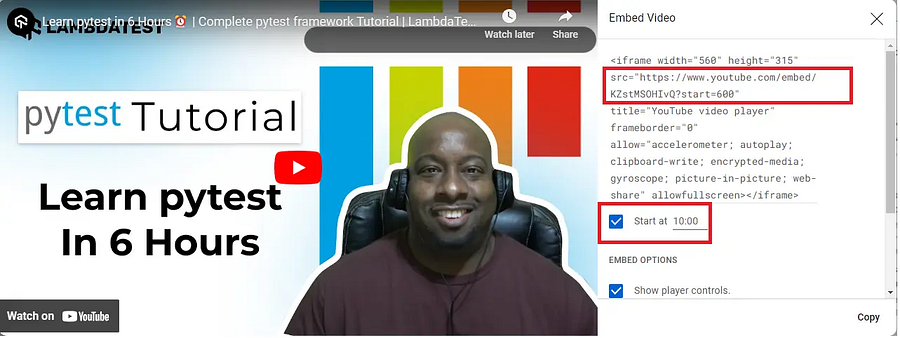
Copy and paste the link generated by YouTube into the CodePen, and the resulting webpage will look like the one below.
This is only a high-level overview of the <iframe> tag, and a lot more customization is available when using it, but it remains out of the scope of this tutorial to handle iframes in Playwright as we will concentrate on handling web pages that contain iframes with Playwright.
Need to calculate SHA256 hashes? Try our SHA256 hash calculator now!
What is the difference between Frames and iFrames?
The <frame> and <iframe> tags represent a way to divide a web page into parts. The major difference between the two is that the frame tag is no longer supported in HTML 5, and iframe is the preferred way to embed content from one website to another.
When you use the <frame> tag, then the content of a web page consists of frames that are created by using <frame> and <frameset> tags only (and <body> tag is not used).
<html>
<head>
<title>HTML Frames</title>
</head>
<frameset rows="20%,70%,10%">
   <frame name="top" src="/html/top.html" />
   <frame name="main" src="/html/main.html" />
   <frame name="bottom" src="/html/bottom.html" />
</frameset>
</html>
And when you use <iframe>, then the content of web page doesn’t contain frames and content of web page is created by using <body> tag (and <frame> and <frameset> tags are not used) as shown below:
<html>
<head>
<title>HTML Iframes</title>
</head>
<body>
<p>See the video</p>
 <iframe width="854" height="480" src="https://www.youtube.com/embed/2eabXBvw4oI"
    frameborder="0"    allowfullscreen>
  </iframe>
</body>
</html>
So <iframe> just brings some other source’s document to a web page. Frameset tags were used to create frames with the tag frame, whereas iframe fulfills the functions of both frame and frameset tags. Unlike frame tags, iframe tags can also be placed inside the body tags.
Placement of <iframe> is easy, as a developer can easily put the iframe tag among the other webpage tags and add several iframe tags. On the other hand, placing frame tags in a frameset can be a bit more challenging.
{% youtube jX3v3N6oN5M %}
You can also Subscribe to the LambdaTest YouTube Channel and stay updated with the latest tutorials around Selenium testing, Playwright browser testing, CI/CD, and more.
Playwright Frame and FrameLocator
Playwright’s Page class API provides two methods to handle frames in Playwright. These are page.frame() and page.frame_locator().
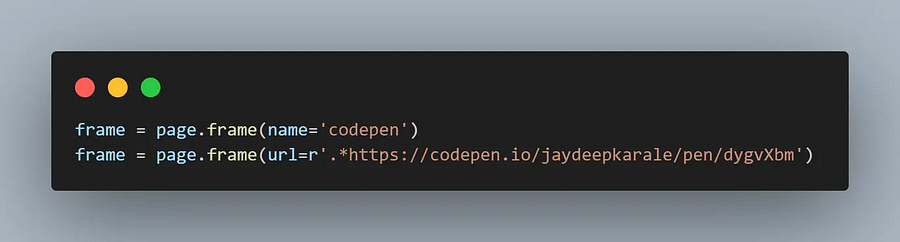
page.frame()
Returns a frame matching the specified criteria.
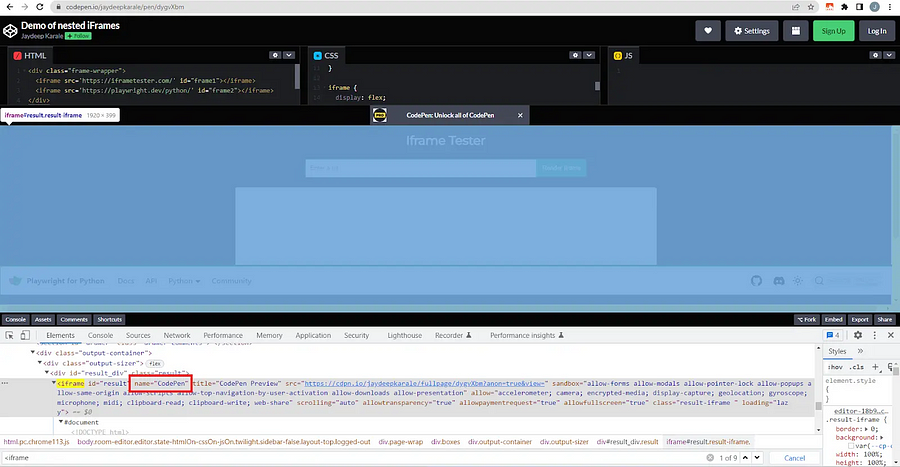
To locate the frame using the frame() method, the name or URL of the frame must be supplied to this method. In the example below, you can locate the CodePen <iframe> name or the page URL.
page.frame_locator()
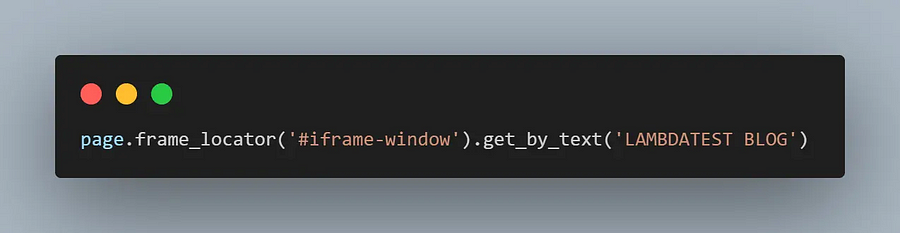
When working with iframes in Playwright, you can create a frame locator that will enter the iframe and allow selecting of elements in that iframe.
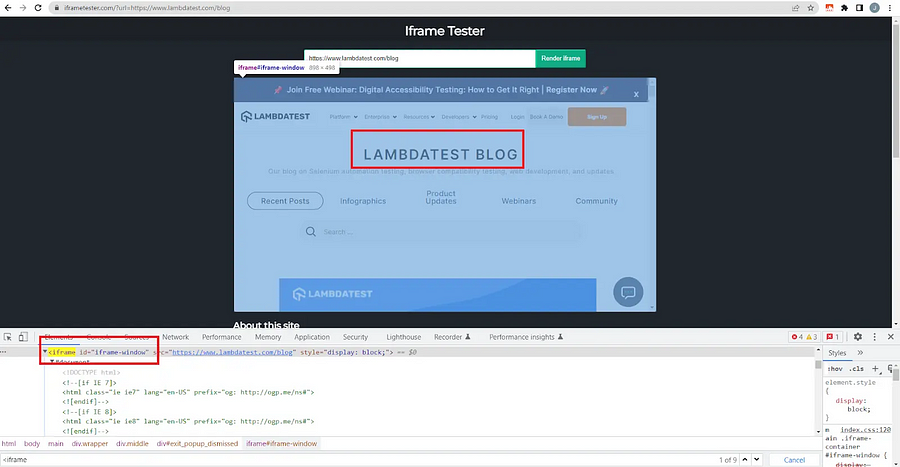
The below code snippet will select the frame with id=’iframe-window’ and search for the text element ‘LAMBDATEST BLOG’.
🛎️The frame and frame_locator() methods are available in all language APIs, but their naming convention might differ slightly. For example, in TypeScript API, frame_locator() is called frameLocator() by the language naming convention. But the functionality and use case remains the same.
Now that you have learned the nuances of frames and iframes in Playwright let’s dive deep into handling iframes in Playwright using Python and TypeScript. The demo will consist of four tests, two using the Python API of Playwright and two using the TypeScript API of Playwright.
You will also see how to run the tests on the Playwright cloud grid provided by LambdaTest.
Looking for a quick difference checker? Check out our tool!
How to set up Playwright with Python?
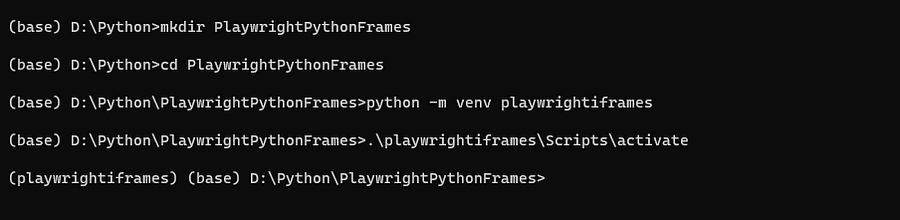
Before we begin, let us look at how to set up Playwright Python. The first thing you need for any Python project is a dedicated virtual environment to isolate the required dependencies. For this project, let’s create and activate an environment named playwrightiframes.
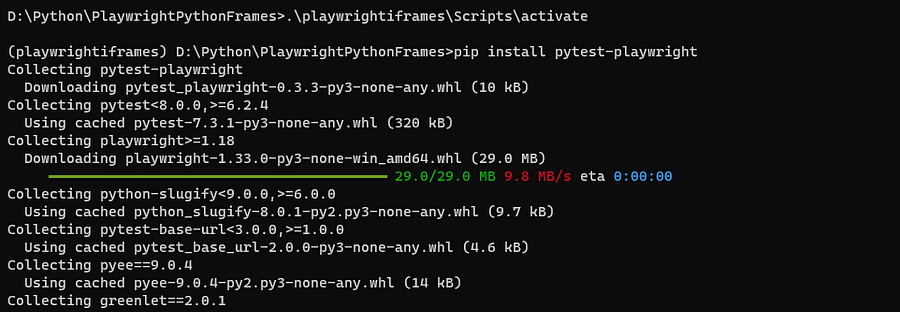
Next, let’s install Playwright. The packages that need to be installed are shown below and available in the requirements.txt file on the GitHub repo of this code.
And then download all browsers. You can also download specific browsers like Chromium or Firefox instead of downloading them. This step is unnecessary when using a cloud grid like LambdaTest, as LambdaTest will provide the browsers.

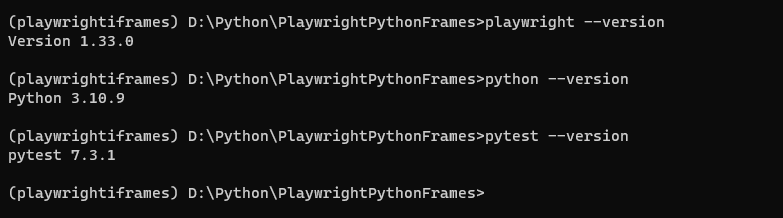
All the test scenarios used for the demo in this tutorial on handling iframes in Playwright are compatible with Playwright version 1.33, pytest version 7.3.1, and Python version 3.10.1.
Before moving to the testing scenario, let’s understand the project structure and some important configuration files necessary to run the tests. The project structure looks as below.
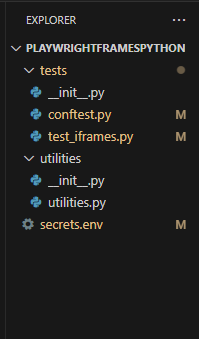
Let us now look at the content of each file.
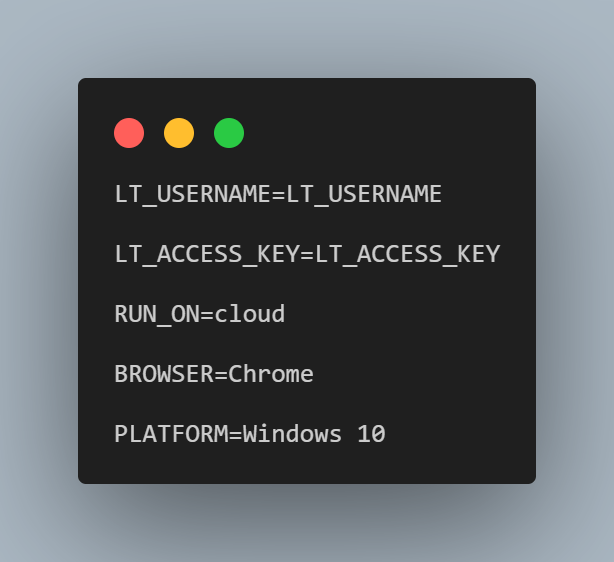
The first file you can see is secrets.env, which is used to store the environment variables that hold the username and API key to access the cloud grid.
The variable RUN_ON controls whether the tests run locally or on a cloud grid.
The variables BROWSER and PLATFORM control the web browser and operating system used when running tests on the cloud grid.
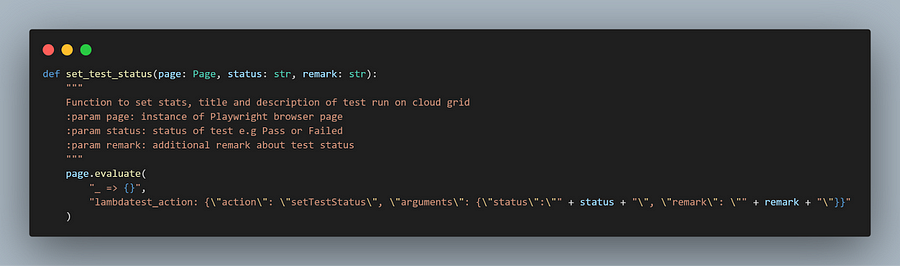
Here is what the complete utilities.py file looks like.
from playwright.sync_api import Page
from dotenv import load_dotenv
import os
load_dotenv('secrets.env')
platform = os.getenv('PLATFORM')
browser = os.getenv('BROWSER')
run_on = os.getenv("RUN_ON") or 'local'
def set_test_status(page: Page, status: str, remark: str):
"""
Function to set stats, title and description of test run on cloud grid
:param page: instance of Playwright browser page
:param status: status of test e.g Pass or Failed
:param remark: additional remark about test status
"""
page.evaluate(
"_ => {}",
"lambdatest_action: {\"action\":\"setTestStatus\", \"\": \status\":\"" + status + "\", \"remark\": \"" + remark + "\"}}"
)
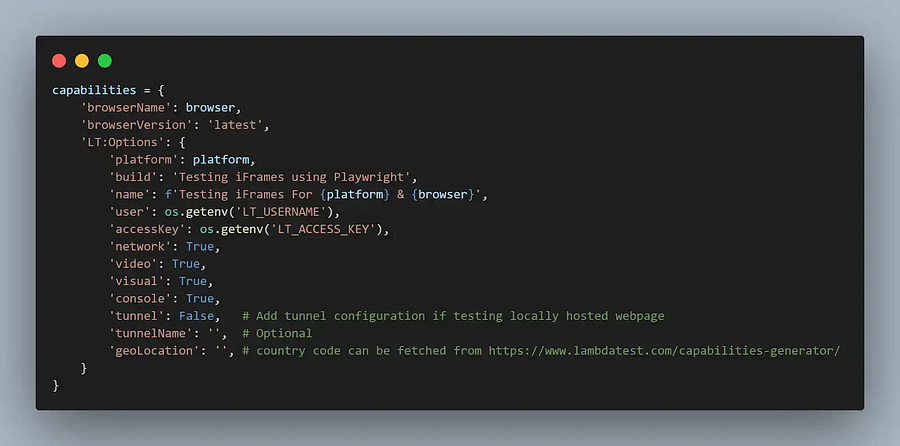
capabilities = {
'browserName': browser,
'browserVersion': 'latest',
'LT:Options': {
'platform': platform,
'build': 'Testing iFrames using Playwright',
'name': f'Testing iFrames For {platform} & {browser}',
'user': os.getenv('LT_USERNAME'),
'accessKey': os.getenv('LT_ACCESS_KEY'),
'network': True,
'video': True,
'visual': True,
'console': True,
'tunnel': False, # Add tunnel configuration if testing locally hosted webpage
'tunnelName': '', # Optional
'geoLocation': '', # country code can be fetched from https://www.lambdatest.com/capabilities-generator/
}
}
The utilities.py file is used to store reusable functions. The first line is to import the Page class from the playwright.sync_api. The page class provides methods to interact with the single tab within the browser.
The run_on variable determines if the tests run on a cloud grid or locally. It has been defaulted to run tests locally.
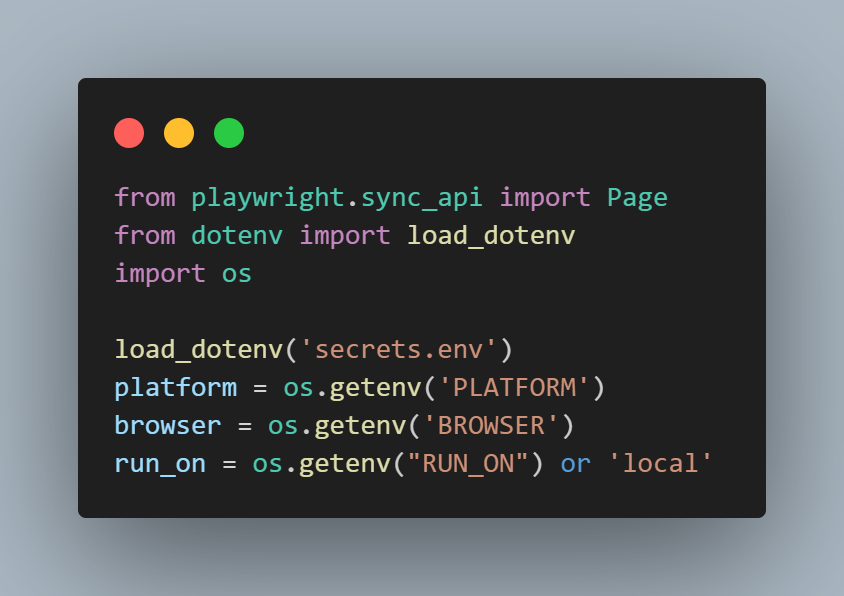
For reading the environment variables, you can use the Python library load_dotenv() and supply to it the ‘secrets.env’ file, which holds all the environment variables.
The set_test_status() function is used to set the final status of the test when running on the cloud grid. It makes use of the evaluate() method of the Page class.
The next reusable bit is the capabilities dictionary, which configures the behavior of the cloud grid such as browser, operating system, name of the build, whether video of test execution will be completed, and screenshots will be captured.
The conftest.py is a special pytest file that contains fixtures that can be globally reused in any pytest file. pytest fixtures can be used to write setup and tear down code necessary to run tests.
We have written two fixtures; the first is named playwright_browser(). It initializes a web browser instance to run locally or establishes a connection to the cloud grid depending on the run_on variable configured in the secrets.env.

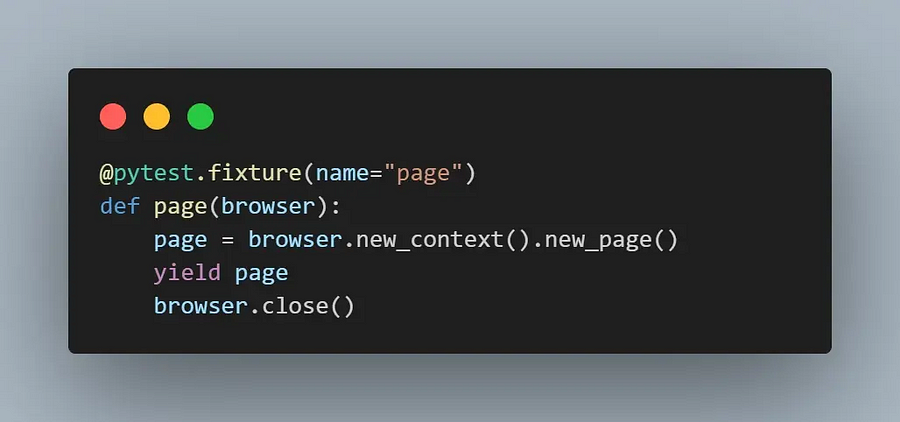
The second fixture is named page, and it uses the browser fixture to initialize a web page within the browser to run tests.
By default, the fixture gets the same name as the function’s name, but you can give a different name to the fixture in @pytest.fixture(name=<name>).
Here is what the complete conftest.py file looks like.
import pytest
from playwright.sync_api import sync_playwright
from utilities.utilities import capabilities, run_on
import subprocess
import urllib
import json

@pytest.fixture(name="browser")
def playwright_browser():
    if run_on == 'local':
        with sync_playwright() as playwright:
            browser = playwright.chromium.launch(headless=False)
            yield browser

    if run_on == 'cloud':
        with sync_playwright() as playwright:
            playwrightVersion = str(subprocess.getoutput('playwright --version')).strip().split(" ")[1]
            capabilities['LT:Options']['playwrightClientVersion'] = playwrightVersion
            lt_cdp_url = 'wss://cdp.lambdatest.com/playwright?capabilities=' + urllib.parse.quote(json.dumps(capabilities))
            browser = playwright.chromium.connect(lt_cdp_url)
            yield browser

@pytest.fixture(name="page")
def page(browser):
    page = browser.new_context().new_page()
    yield page
    browser.close()
Want to add some fun to your text? Try our shuffle letters tool!
Test Scenario: How to handle nested iFrames in Playwright?
In this scenario, we will check in detail how to handle nested iframes in Playwright.
Implementation
The complete test code is as below.
from playwright.sync_api import expect, Keyboard
from utilities.utilities import set_test_status
import re
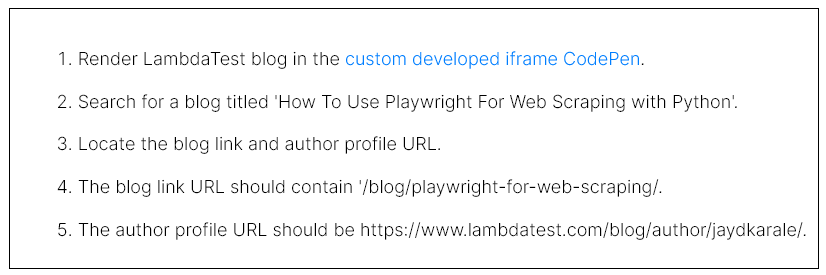
def test_nested_iframe_can_be_loaded_correctly(page):
"""
Test nested iframes can be rendered correctly with the lambdatest blog website.
Search for blog 'How To Use Playwright For Web Scraping with Python' by author Jaydeep Karale.
Verify that the blog How To Use Playwright For Web Scraping with Python exists
Also verify that author profile contains correct link
"""
try:
page.goto('https://codepen.io/jaydeepkarale/pen/dygvXbm')
base_frame_locator = page.frame_locator("iframe[name=\"CodePen\"]").frame_locator("#frame1")
base_frame_locator.get_by_placeholder("Enter a url").fill("https://www.lambdatest.com/blog")
base_frame_locator.get_by_role("button", name="Render iframe").click()
base_frame_locator.frame_locator('#iframe-window').get_by_placeholder("Search …").fill('How To Use Playwright For Web Scraping with Python')
page.keyboard.press('Enter')
blog_link_locator = base_frame_locator.frame_locator('#iframe-window').get_by_role('link', name='How To Use Playwright For Web Scraping with Python').first
blog_author_locator = base_frame_locator.frame_locator('#iframe-window').get_by_role('link', name='Jaydeep Karale').first
expect(blog_link_locator).to_have_attribute('href',re.compile('/blog/playwright-for-web-scraping/'))
expect(blog_author_locator).to_have_attribute('href','https://www.lambdatest.com/blog/author/jaydkarale/')
set_test_status(page, 'Passed','Blog exists')
page.pause()
page.close()
except Exception as ex:
set_test_status(page, 'Failed',str(ex))
Code Walkthrough
Let us now go through the test steps step-by-step.
Step 1
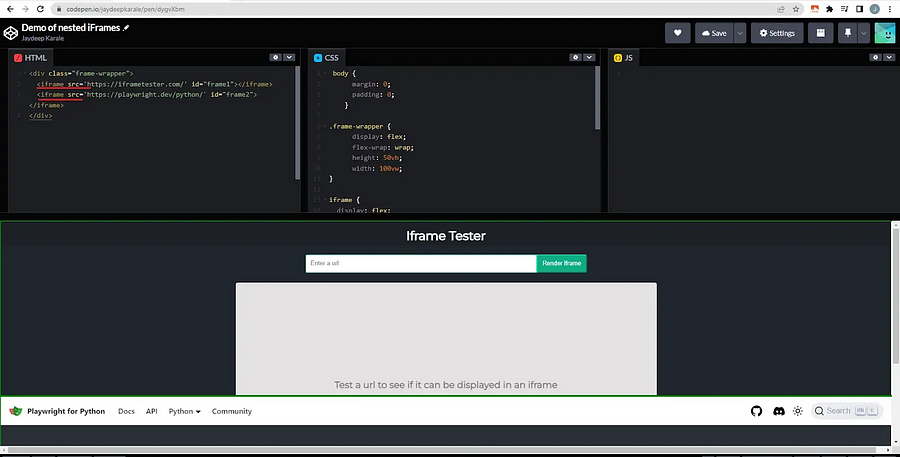
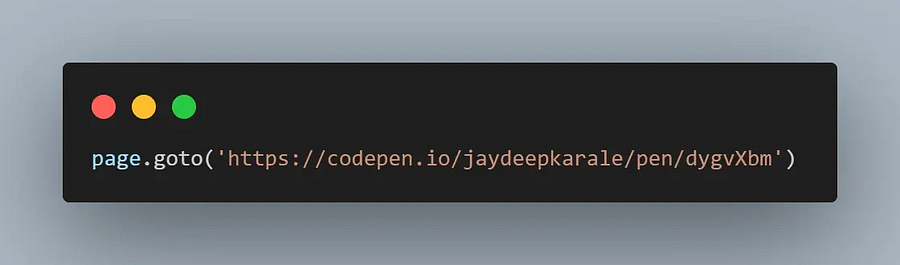
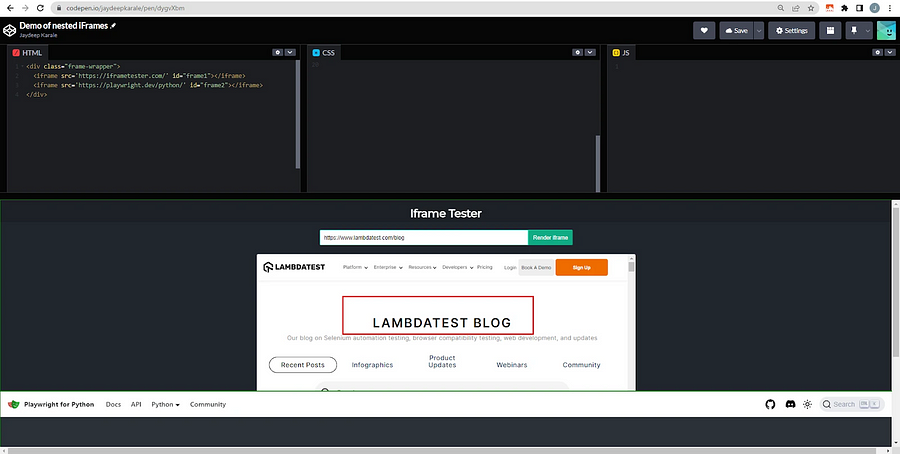
First, navigate to the custom-developed CodePen using the goto() method available as part of the page API.
The CodePen contains two iframes; one iframe renders iframetester.com the second iframe renders the Playwright Python homepage.
Step 2
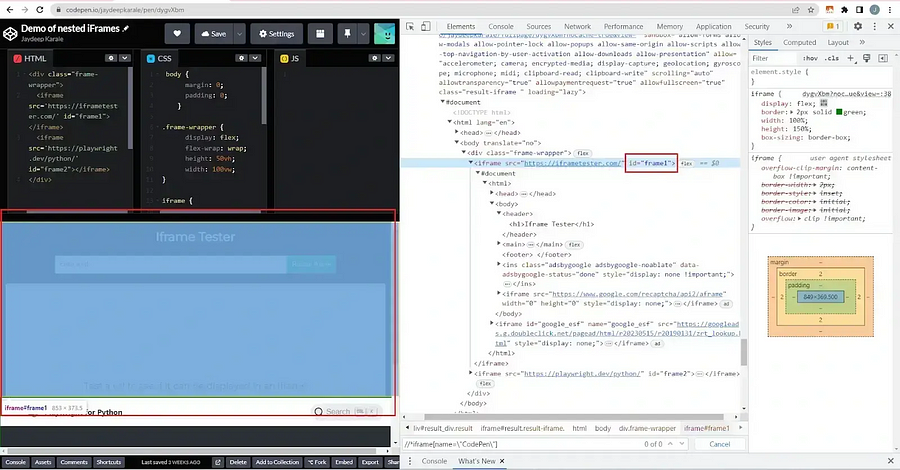

Next, use the frame_locator() method and supply the id of the frame, in this case, frame1, to form the base locator. All the subsequent elements will be located using this base locator as a reference.
Step 3
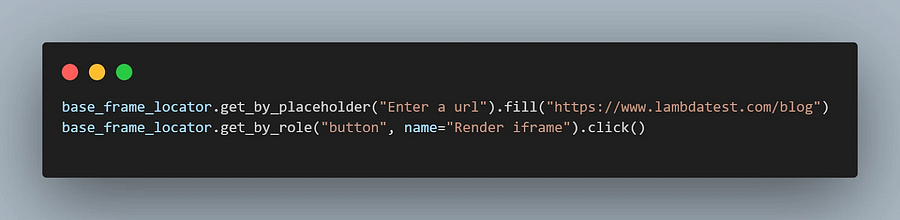
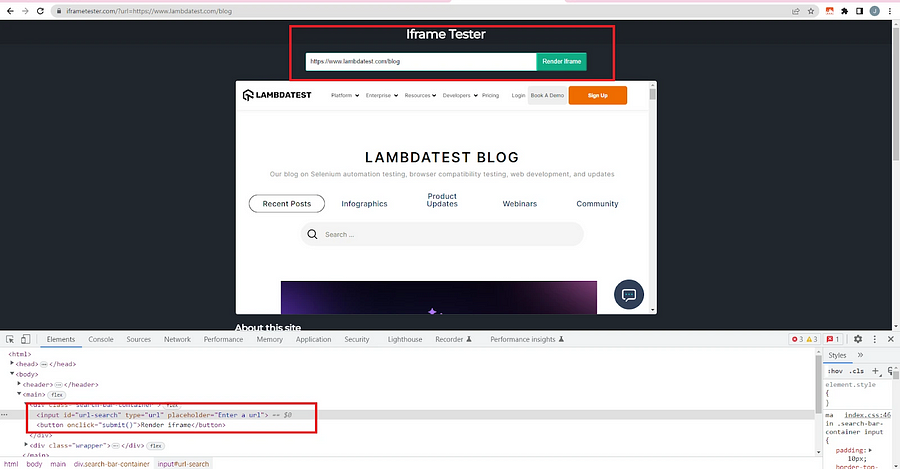
In this step, use the base_frame_locator to locate the input field on iframetester using the Playwright locator get_by_placeholder() since the field has a placeholder text ‘Enter a url’ assigned to it.
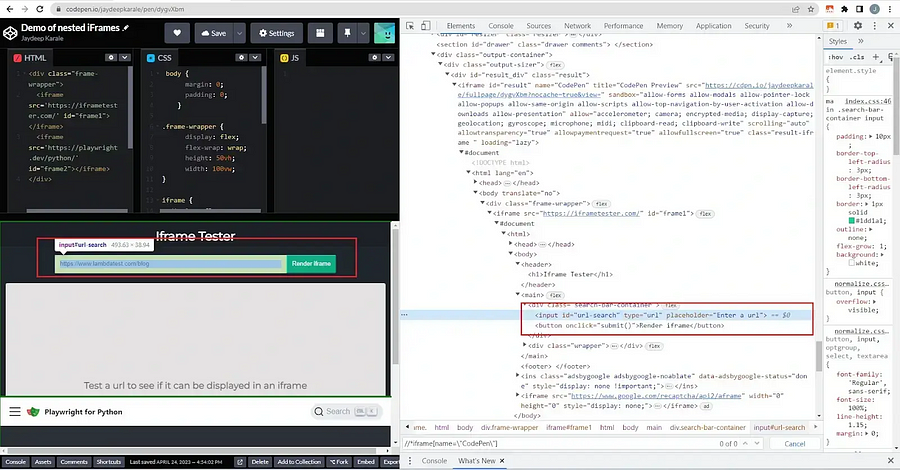
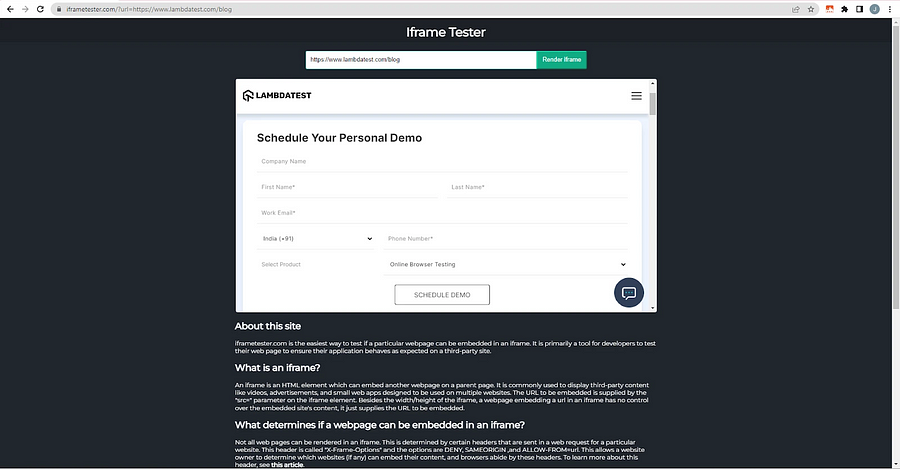
Fill in the URL of lambdatest.com/blog, which will redirect to the blog page of LambdaTest. After filling in the URL, you can use the get_by_role() locator to find the ‘Render iframe’ button and perform a click() action on it.
The rendered website is shown below.
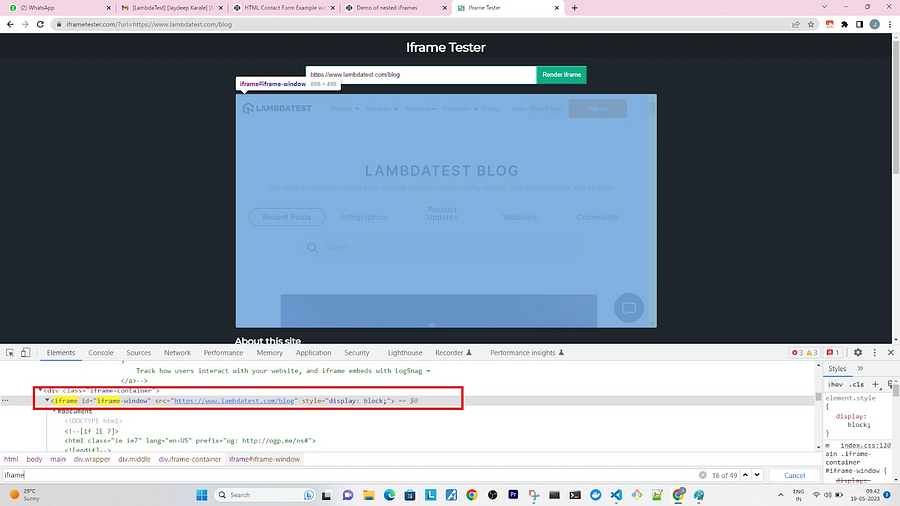
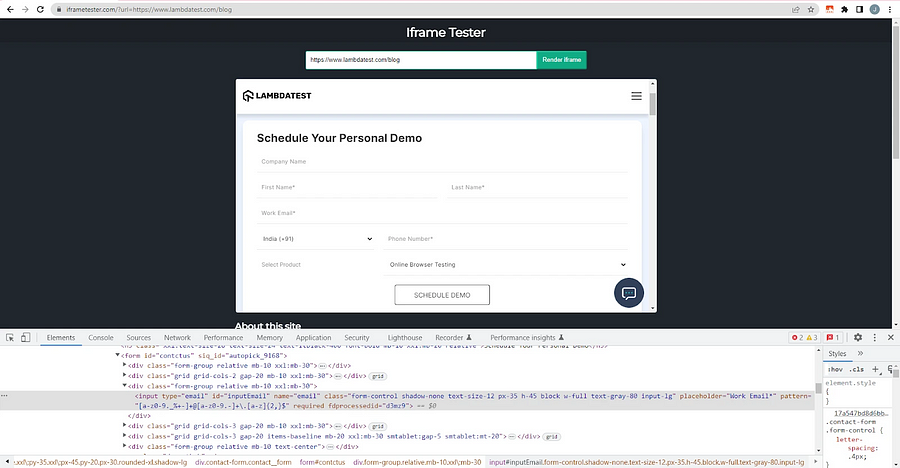
Step 4
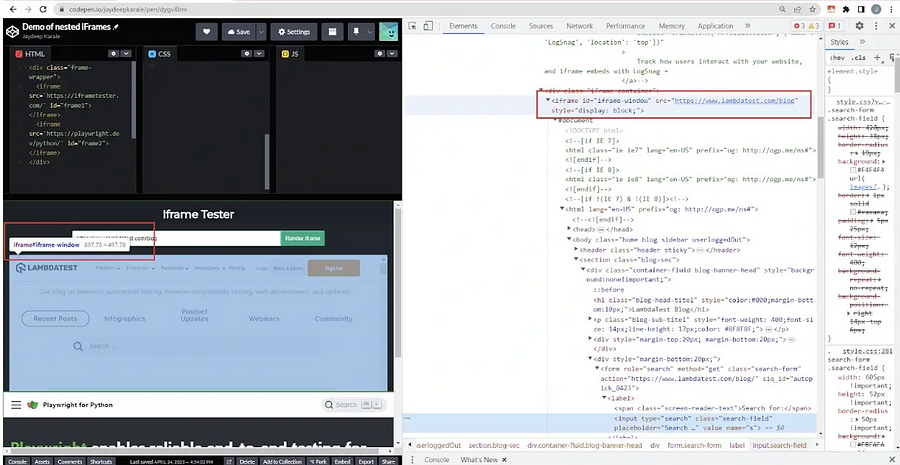
On inspection of the CodePen once more, you can see that the iframe rendered by the iframetester website has an id=’iframe-window’. You can leverage this fact to interact with elements within the iframe.

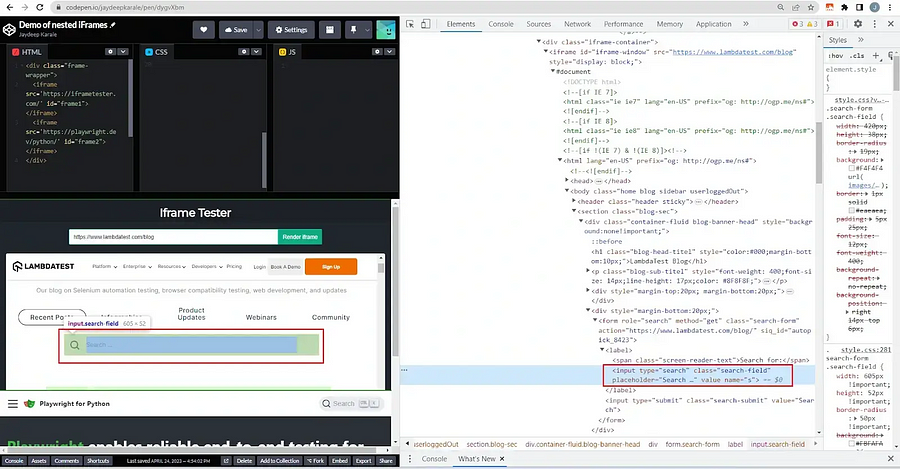
The element you will locate is the ‘Search’ input field. It has a placeholder text ‘Search …’ which can be used by the Playwright locator get_by_placeholder(), and in the located element, search for the blog ‘How To Use Playwright For Web Scraping with Python’.
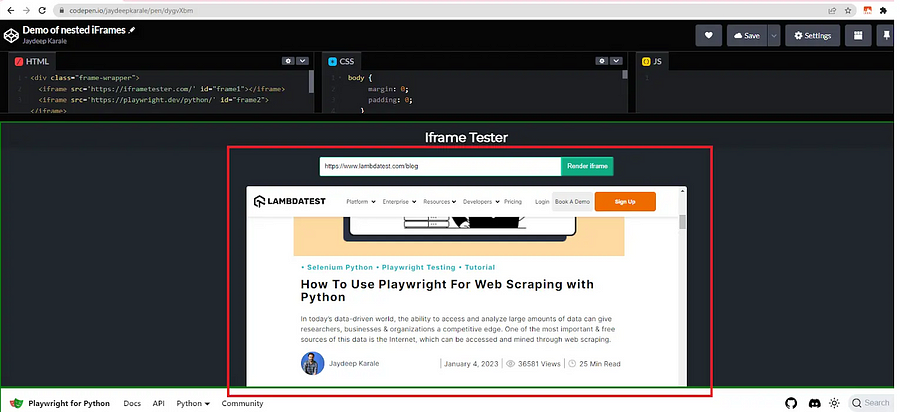
The page.keyboard.press(‘Enter’) will simulate pressing enter on the web page.
The search results appear and look like the image shown below.
Step 5
Next, use base_frame_locator to look for the nested <iframe> by id=’iframe-window’. Within the nested iframe, use the get_by_role() Playwright locator to look for a link to the blog under test.
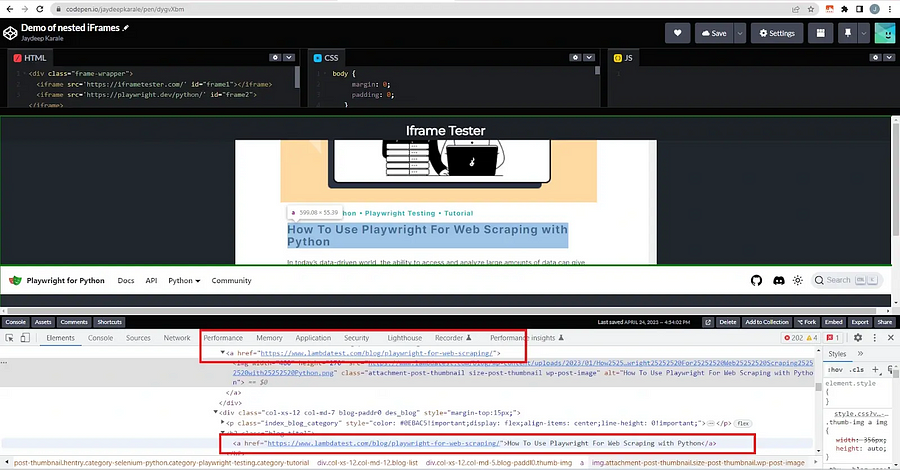

Since the link <a href=”https://www.lambdatest.com/blog/playwright-for-web-scraping/"> is used twice, one for the title of the blog and once for the image of the blog, consider the first located link using the first attribute and assign it to blog_link_locator variable.
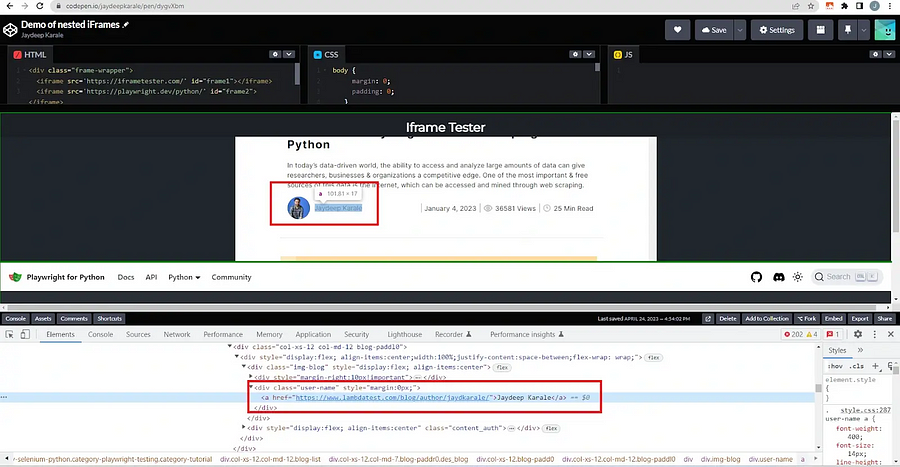

The blog author profile is also represented by a link. You can use the get_by_role() Playwright locator and locate the ‘link’ with the text ‘Jaydeep Karale’ and assign it to a variable blog_author_locator.
Step 6
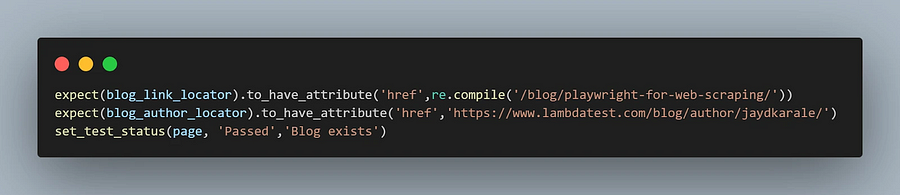
You can use the expect() Playwright assertion to test if the element located by the blog_link_locator has an href attribute ‘/blog/playwright-for-web-scraping.’
Then, use expect() assertion on the blog_author_locator() to test if the author’s profile contains ‘jaydkarale’, the short name of the author.
The set_test_status() method discussed in the utilities.py is used to communicate the test status to the cloud grid if tests run on cloud infra.
Step 7
page.pause()
page.close()
The pause() method in the page class is helpful when debugging tests and is used to pause the execution at this point.
The close() method is called to close the page context.
This completes the first test scenario where you saw how to handle nested iframes using the Playwright frame and frame_locator methods. Let us look at another test scenario to fill in a ‘Book A Demo’ form rendered within an <iframe\>.
Convert your text to text lowercase effortlessly using our online tool.
Test Scenario: How to handle Forms within iFrames in Playwright?
Implementation
The complete test code looks as below.
def test_iframe_tester_fill_book_a_demo_form(page):
"""
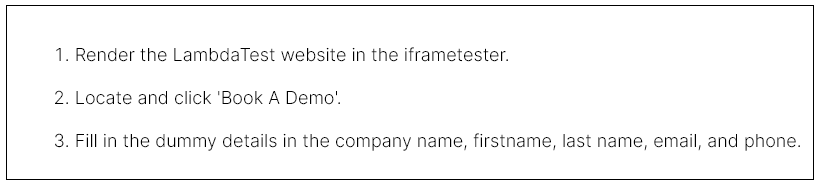
Test if iframe renders the lambdatest blog URL correctly.
Click on Book A Demo and fill the form with company name, firstname, lastname, email and phonenumber
"""
try:
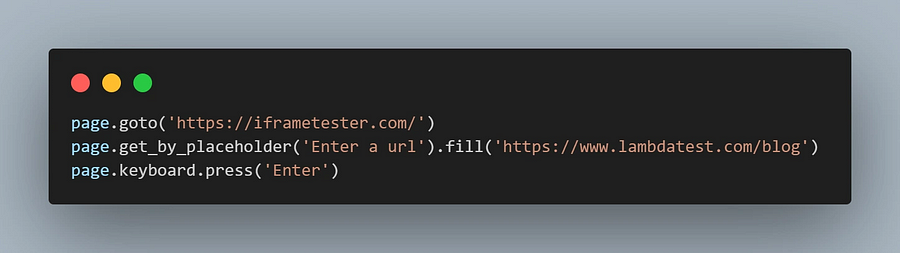
page.goto('https://iframetester.com/')
page.get_by_placeholder('Enter a url').fill('https://www.lambdatest.com/blog')
page.keyboard.press('Enter')
page.frame_locator('#iframe-window').get_by_role('link', name='Book A Demo', exact=True).click()
page.frame_locator("internal:text=\"<p>Your browser does not support iframes.</p>\"i").get_by_text("Allow Cookie").click()
page.frame_locator("internal:text=\"<p>Your browser does not support iframes.</p>\"i").get_by_placeholder("Company Name").fill('Test Company')
page.frame_locator("internal:text=\"<p>Your browser does not support iframes.</p>\"i").get_by_role("textbox", name="First Name*").fill('Test First Name')
page.frame_locator("internal:text=\"<p>Your browser does not support iframes.</p>\"i").get_by_role("textbox", name="Last Name*").fill('Test Last Name')
page.frame_locator("internal:text=\"<p>Your browser does not support iframes.</p>\"i").get_by_role("textbox", name="Work Email*").fill('sample@sample.com')
page.frame_locator("internal:text=\"<p>Your browser does not support iframes.</p>\"i").get_by_role("textbox", name="Phone Number*").fill('1234567890')
page.pause()
set_test_status(page, 'Passed','Form input completed')
page.close()
except Exception as ex:
set_test_status(page, 'Failed',str(ex))
Code Walk Through
Let us now go through the test cases step-by-step.
Step 1
Load the iframetester website using the page.goto() method. The input field to enter the website is rendered as a placeholder text ‘Enter a url’. You can use this with the Playwright locator get_by_placeholder() to locate the input field and enter the URL of the LambdaTest blog website.
Then, simulate an enter key press using the keyboard.press() method to render the website under test.
Step 2
The iframe within the iframetester website has the id=’iframe-window’, which is used to interact with the website rendered within the iframe.

Within the iframe ‘Book A Demo’ is a link located using the Playwright locator get_by_role() with link as an attribute and perform click() action on it.
Step 3
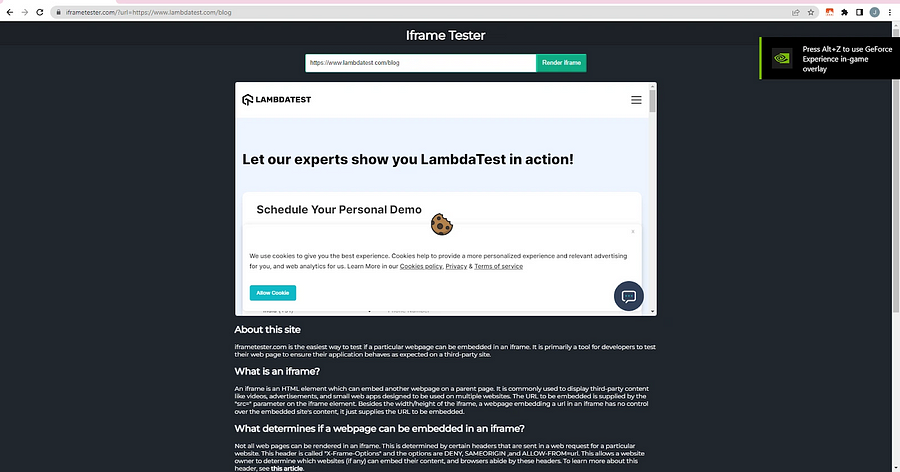

The ‘Allow Cookie’ button is located and clicked, which makes the ‘Book Demo’ form visible.
Step 4

The form elements are input fields, and you can locate them using the placeholder text by using the get_by_placeholder() locator or get_by_role(‘textbox’). You can see both of them used to demo each locator.
On the located elements, call the fill() method to populate the values.
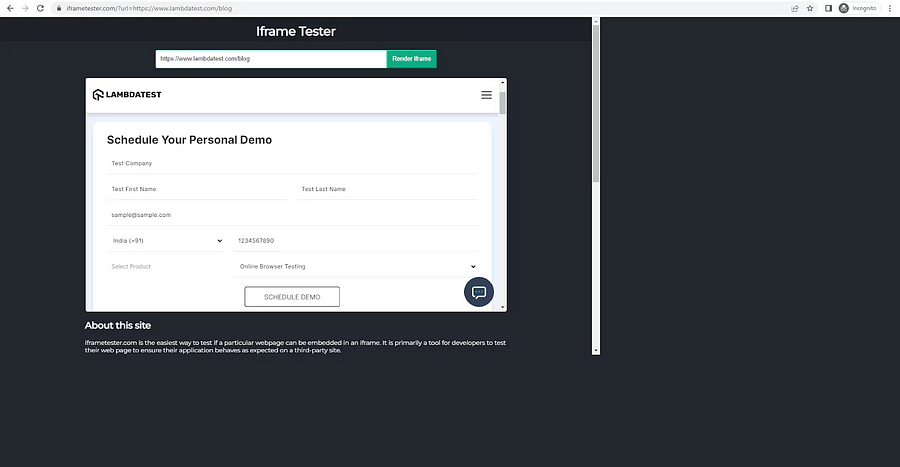
Execution
First execute the tests locally by setting the variable RUN_ON=local in the secrets.env file and running the command pytest -v.
Both tests pass successfully.

For the second test, you can also see the ‘Book A Demo’ form populated with the dummy values you provided in the test case.
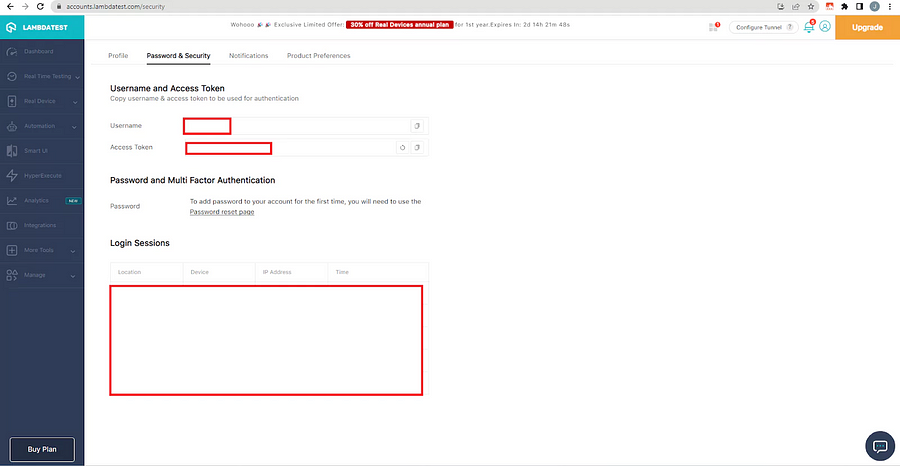
To run the tests on a cloud grid, use the cloud grid provided by LambdaTest for Playwright automated testing. For that, amend the secrets.env file to set the RUN_ON=cloud and the LT_USERNAME and LT_ACCESS_KEY, both of which can be obtained from the LambdaTest Profile Page.
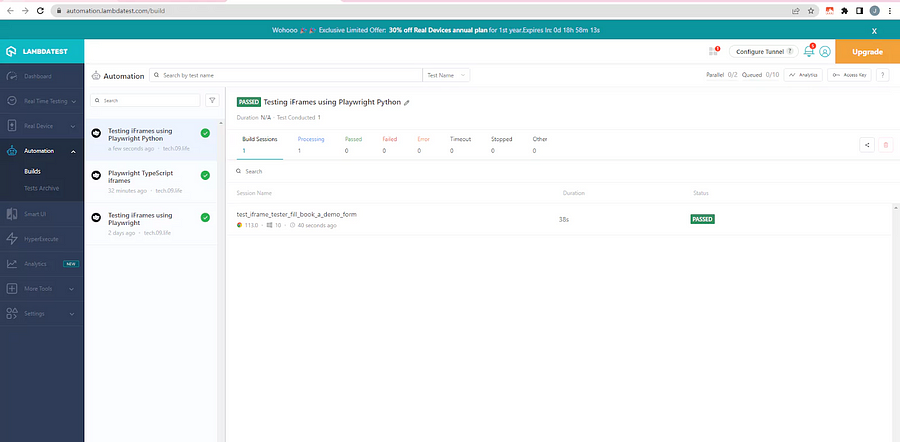
Running the tests using pytest -v, you can see the tests running on the LambdaTest Dashboard. The dashboard clearly shows the status of the tests as configured in the set_test_status() function.
Additional configurations made in the capabilities dictionary in utilities.py, such as the build and name of the tests, are displayed.
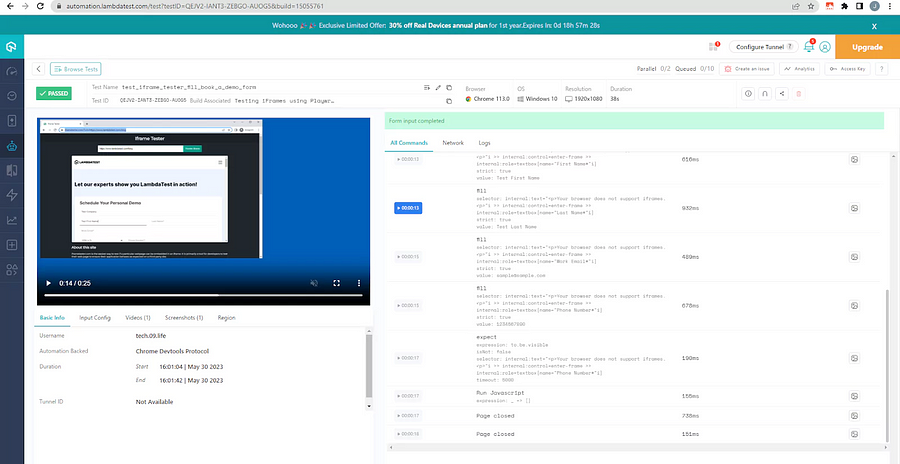
Additionally, when you open any test, you can see more information such as video of the execution, screenshots, test status, browser, and operating system where the tests are running.
Give your text a twist with our unique text rotater tool.
How to set up Playwright with TypeScript?
Using Playwright with its Typescript API has its advantages. In terms of installation, there are two ways in which Playwright can be installed, one of them is using the Node.js package manager like npm. The second method is using the Playwright VS Code extension.
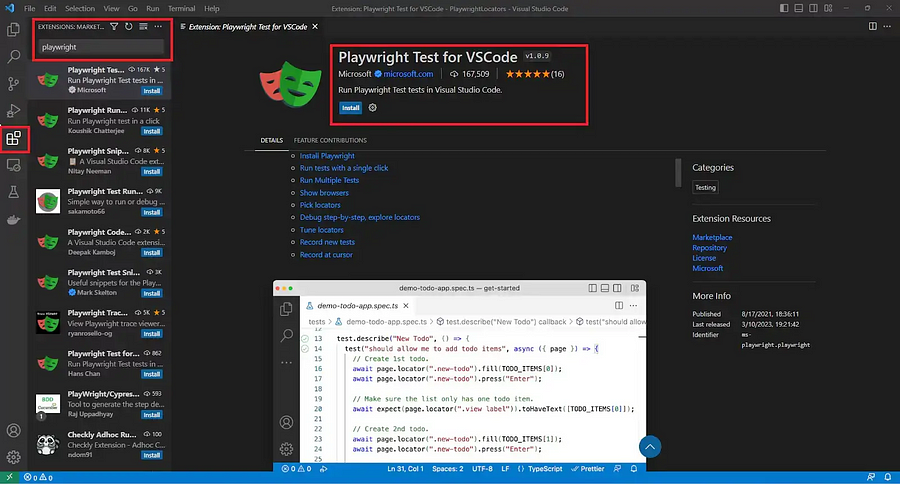
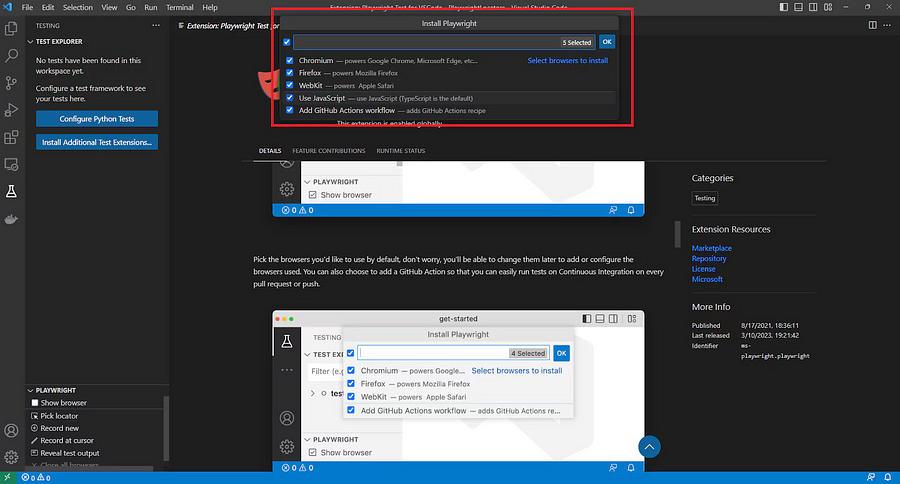
Navigate to the extension manager on VS Code and search for Playwright. Then install the official Playwright Test for VS Code, as shown in the image below.
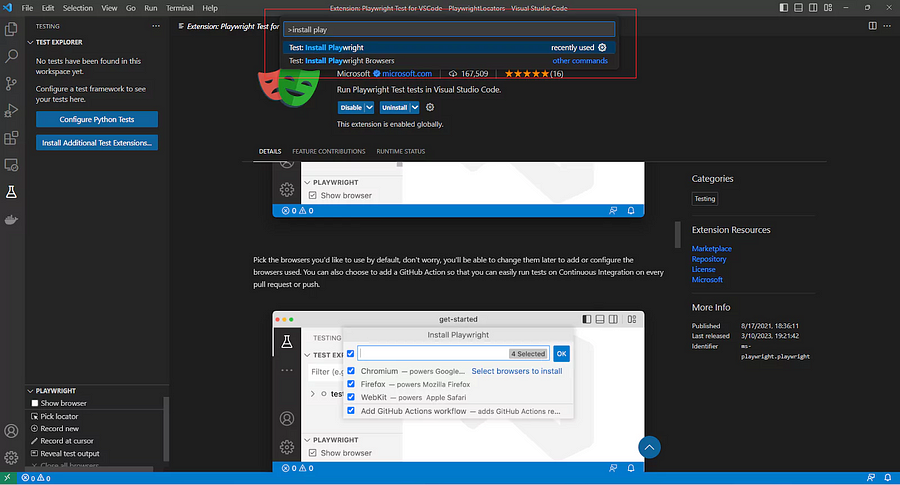
Once the official extension is installed, use the ‘Install Playwright’ action from the command panel to get started.
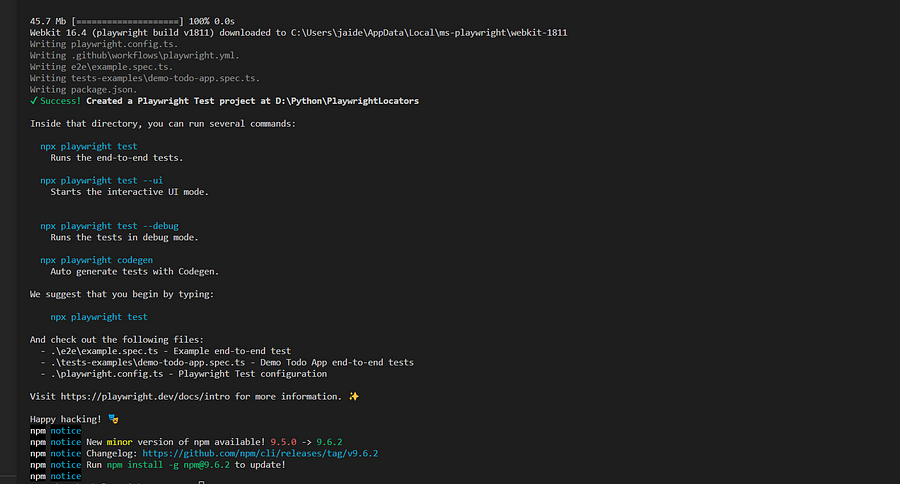
A successful installation will result in logs that look like the below image.
Successful installation will produce a directory structure that resembles the image shown below.
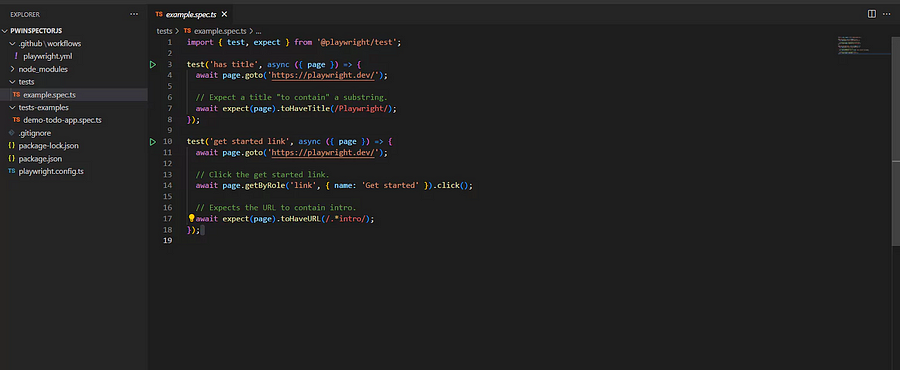
The tests folder will contain a sample test, and all new tests should be added to this folder only. The package.json will contain the Playwright version, and a demo test app is also included in the test-examples folder.
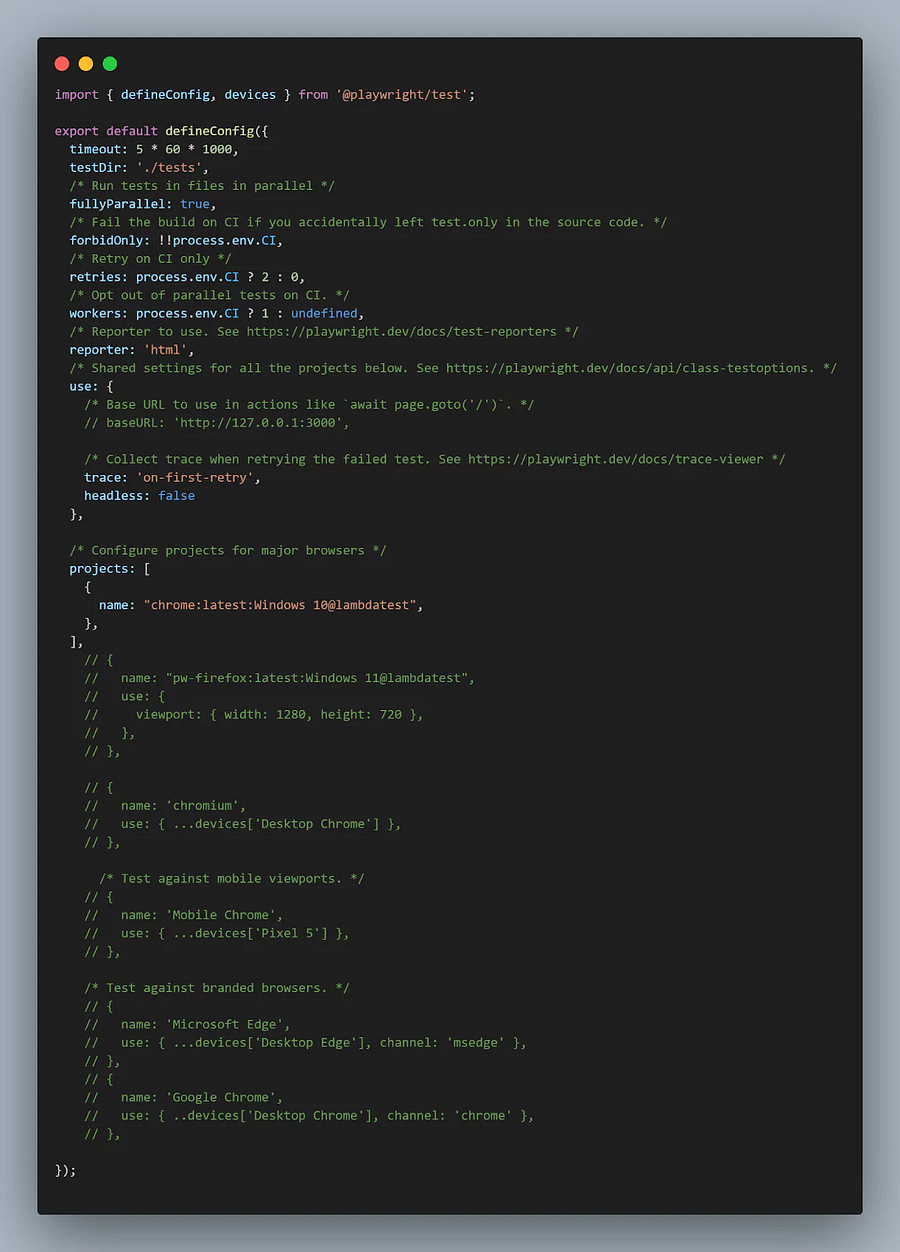
The playwright.config.ts is an important file generated as part of the installation, which stores the configuration information of where the tests are located
export default defineConfig({
  testDir: './tests',
The reporter to be used to generate reports after tests are run:
reporter: 'html',
Below is the list of browsers and device viewports to run the tests on. We will be later configuring this file to debug tests on mobile viewports. Here are the complete contents of the file.
All the test scenarios used for the demo in this blog are compatible with Playwright version 1.32.2, NodeJS version v18.15.0, and npm version 9.5.0.
The setup required for performing Playwright end-to-end testing with TypeScript locally is completed.
When running the Playwright automation on a cloud grid, additional settings are required, but we will discuss them in the execution part of this tutorial on handling iframes in Playwright a bit later.
Test Scenario: How to handle Ajax response in iFrames in Playwright?
Implementation
The complete test code is below.
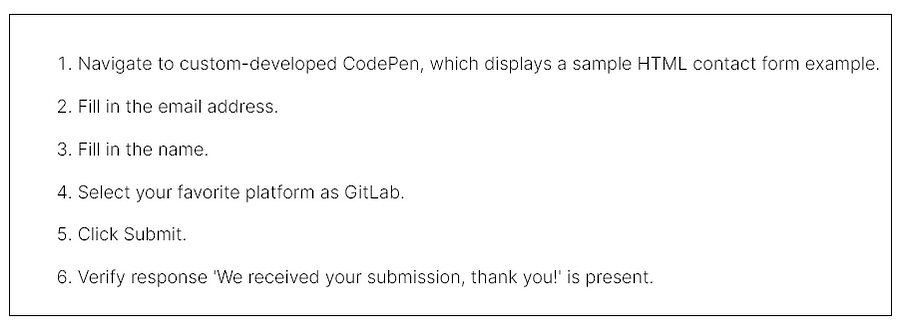
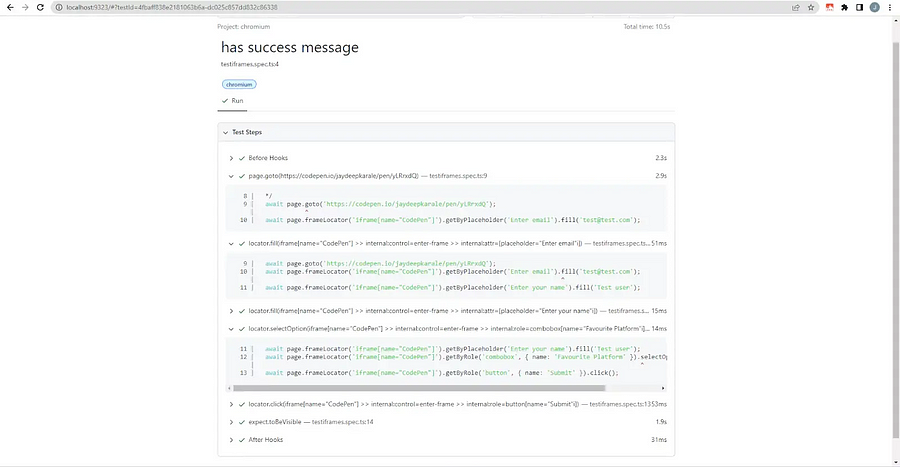
test('has success message', async ({ page }, testInfo ) => {
  /*
  Test if demo email and demo name can be entered in the codepen form and select Gitlab as platform and click Submit.
  On submitting we should be able to verify the success message is displayed
  */
  await page.goto('https://codepen.io/getform/pen/jRoexL');
  await page.frameLocator('iframe[name="CodePen"]').getByPlaceholder('Enter email').fill('test@test.com');
  await page.frameLocator('iframe[name="CodePen"]').getByPlaceholder('Enter your name').fill('Test user');
  await page.frameLocator('iframe[name="CodePen"]').getByRole('combobox', { name: 'Favourite Platform' }).selectOption('Gitlab');
  await page.frameLocator('iframe[name="CodePen"]').getByRole('button', { name: 'Submit' }).click();
  await expect(page.frameLocator('iframe[name="CodePen"]').getByText('We received your submission, thank you!')).toBeVisible();
});
Code Walk Through
Let us now go over the test code step by step.
Step 1
The sample CodePen displaying the contact form is shown below.
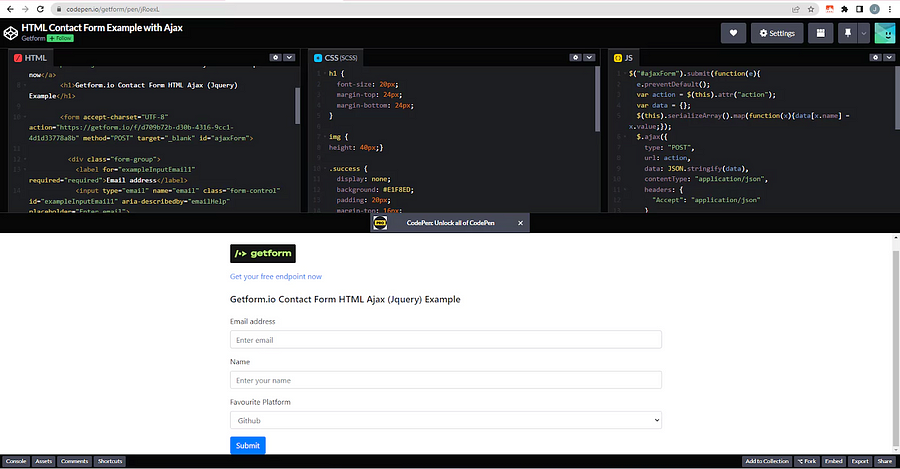
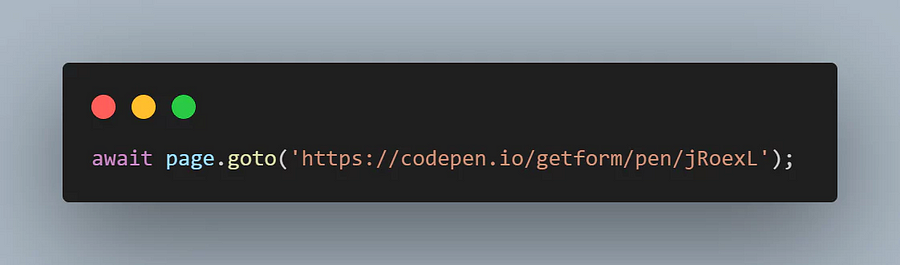
On the browser page, call the goto() method to navigate to the codepen URL.
Step 2
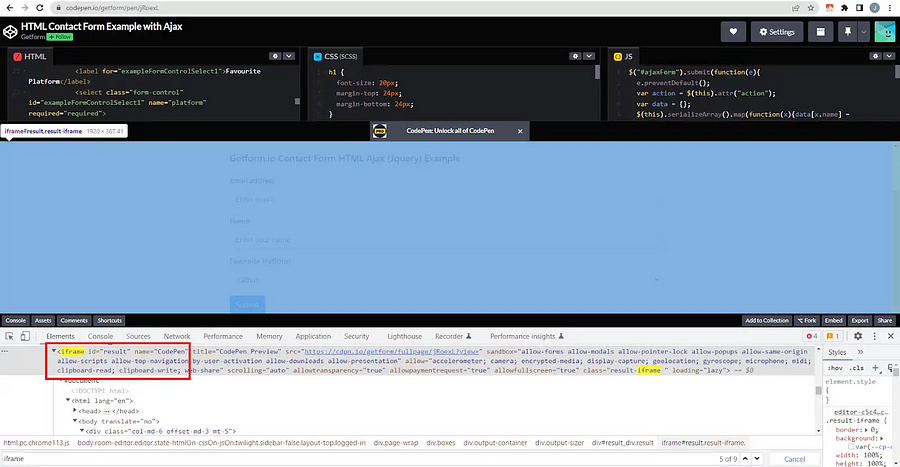
On inspection, you can see that the form is displayed within an iframe with name=’CodePen’. You can leverage this to enter the iframe using the frameLocator() method.
All other elements within the iframe are then located using the frame as a reference.
Step 3
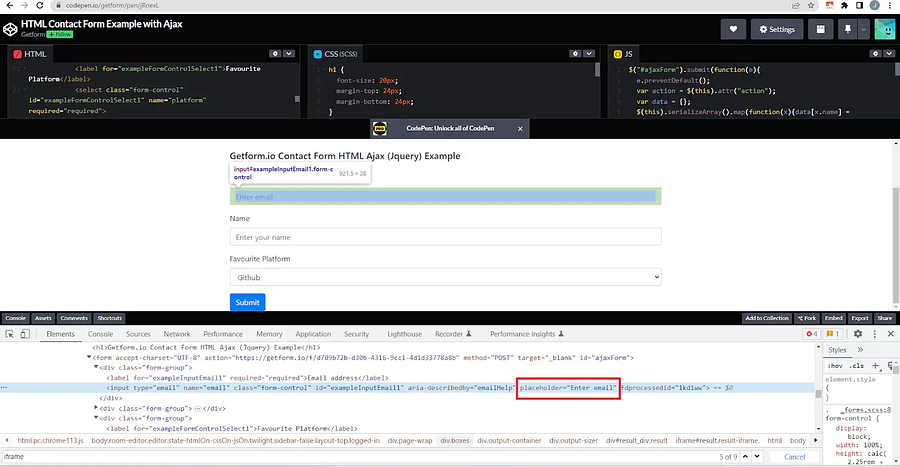

In the iframe, the input field to enter email has a placeholder ‘Enter email’.
We use the Playwright locator getByPlaceholder() and supply the placeholder text and call the fill(‘test@test.com’) method to enter a dummy email.
Step 4
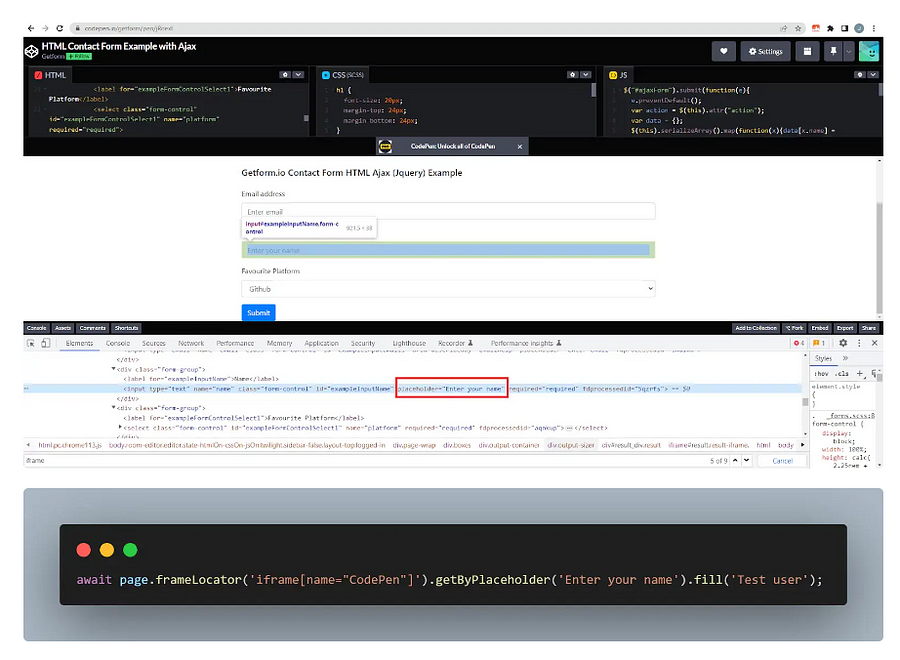
Like the email field, the name input field is located using the placeholder text and getByPlaceholder() Playwright locator.
The fill() method is used to populate a dummy name, ‘Test user’.
Step 5
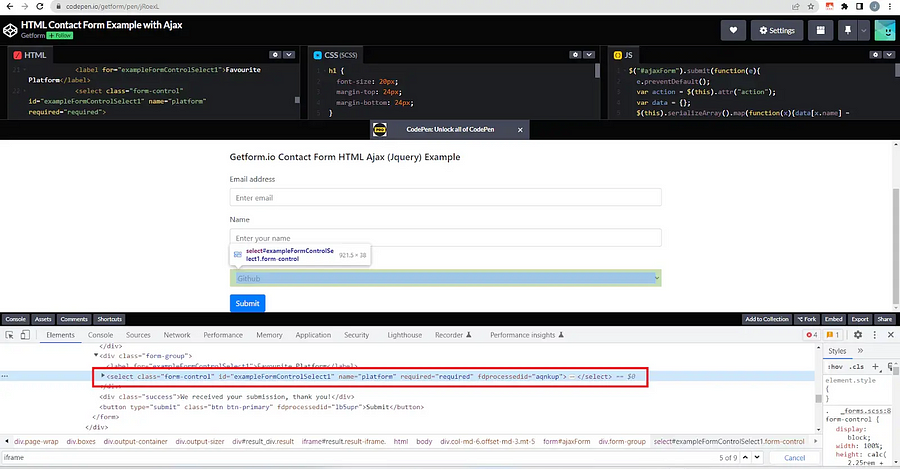

The dropdown to select the platform is located using getByRole (‘combobox’, {name:’Favourite Platform’ } ).
Using the selectOption() method, select the ‘Gitlab’ option.
Step 6

‘Submit’ is a button and the getByRole() method is used with a role argument as ‘button’ and name: ‘Submit’.
The click() method is called on the located button to submit the form.
Step 7
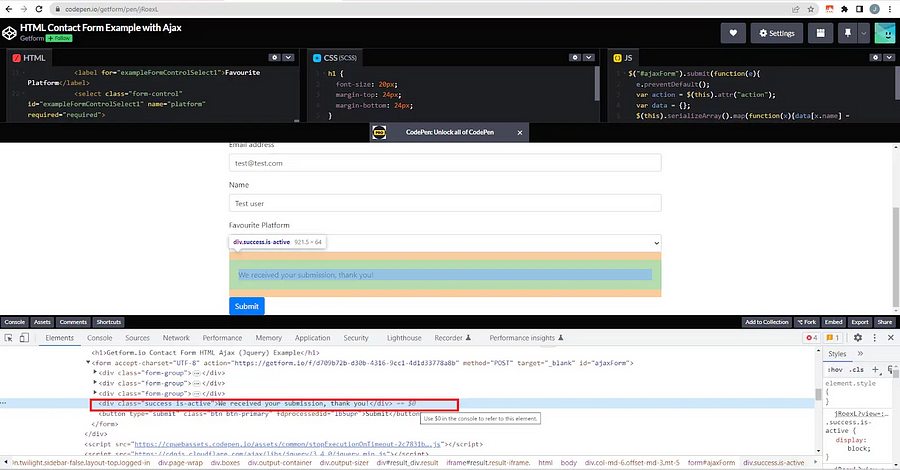

The Playwright assertion — expect() is used to assert the response text toBeVisible().
Test Scenario: How to handle search within iFrames in Playwright?
Implementation
Here is what the complete test looks like.
test('w3 schools has typescript tutorials', async ({ page }) => {
/*
Test if demo website has a search bar and we are able to search for TypeScript tutorials.
*/
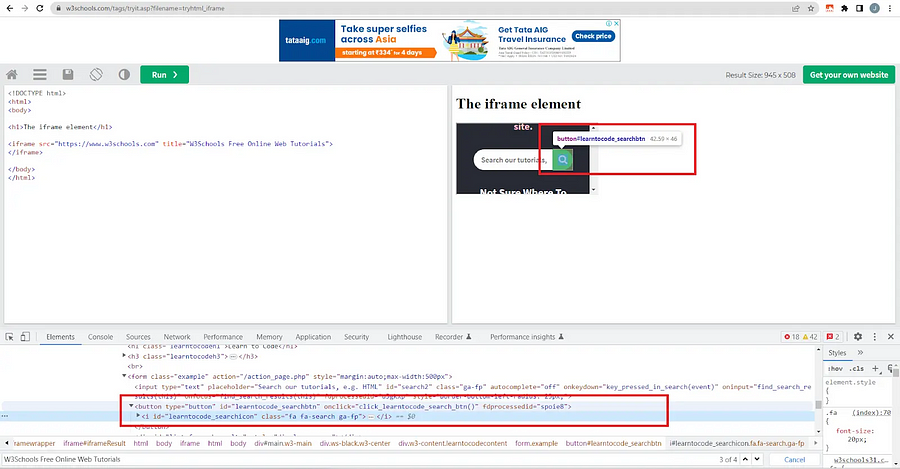
await page.goto('https://www.w3schools.com/tags/tryit.asp?filename=tryhtml_iframe');
await page.frameLocator('iframe[name="iframeResult"]').frameLocator('iframe[title="W3Schools Free Online Web Tutorials"]').getByPlaceholder('Search our tutorials, e.g. HTML').fill('typescript');
await page.frameLocator('iframe[name="iframeResult"]').frameLocator('iframe[title="W3Schools Free Online Web Tutorials"]').getByRole('button', { name: '' }).click();
await expect(page.frameLocator('iframe[name="iframeResult"]').frameLocator('iframe[title="W3Schools Free Online Web Tutorials"]').getByRole('link', { name: 'Start learning TypeScript now »' })).toBeVisible();
});
Code Walk Through
Let us now go over the step-by-step walkthrough of the code.
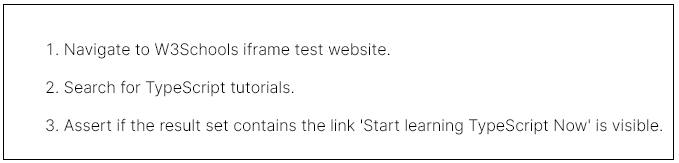
Step 1
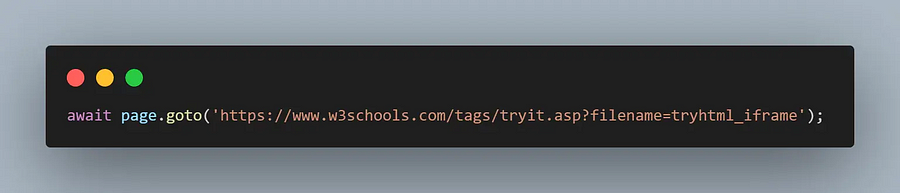
Navigate to the W3Schools iframe test website by calling the goto() method on the page class.
Step 2

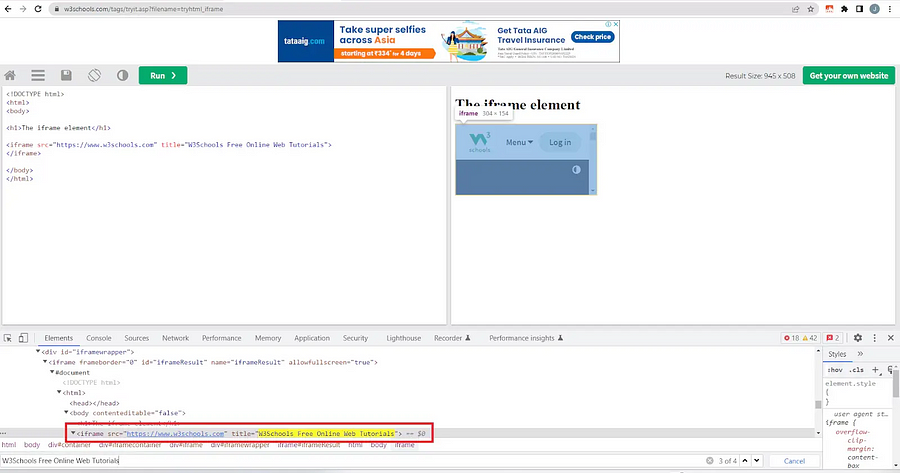

The outer iframe has name=’iframeResult’, and the inner iframe has a title=’W3Schools Free Online Web Tutorials’
You can use chaining to navigate to the inner iframe by using the frameLocator() method twice, once on the outer iframe and then on the inner iframe in Playwright.
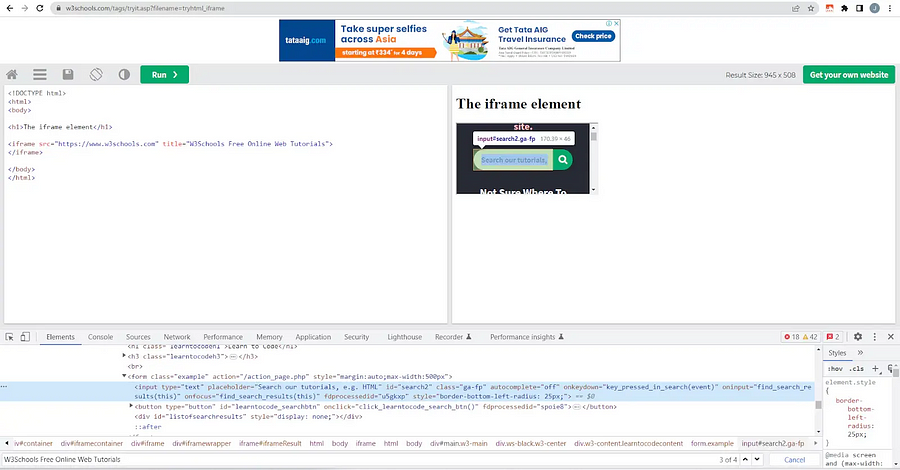
In the inner iframe, we use the getByPlaceholder() to locate the search field and fill in the value ‘typescript’ to search for all TypeScript content.
Step 3

The chaining is continued in this step as well to navigate to the inner frame.
Within the inner frame, the search is located by using getByRole(‘button’), and then the click() action is performed.
Step 4
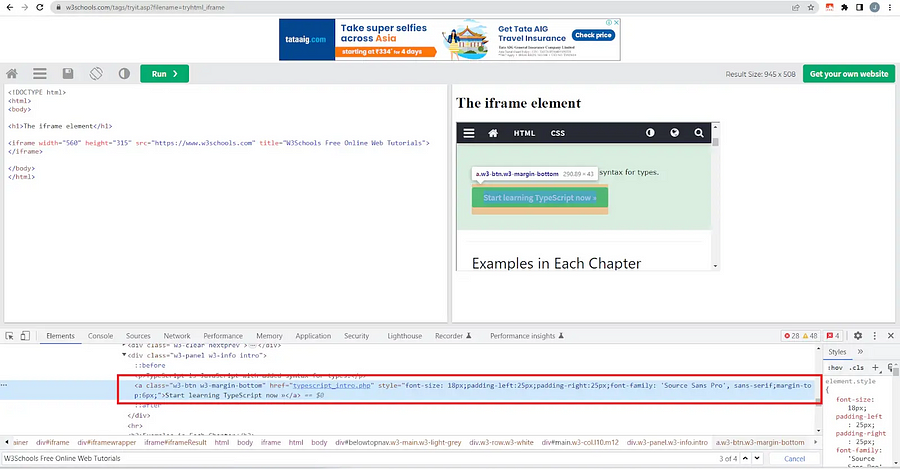

The results contain a ‘Start learning Typescript now’ link.
You can use Playwright assertion expect() to assert this link toBeVisible(), which is a method to assert the visibility of elements on a webpage.
Execution
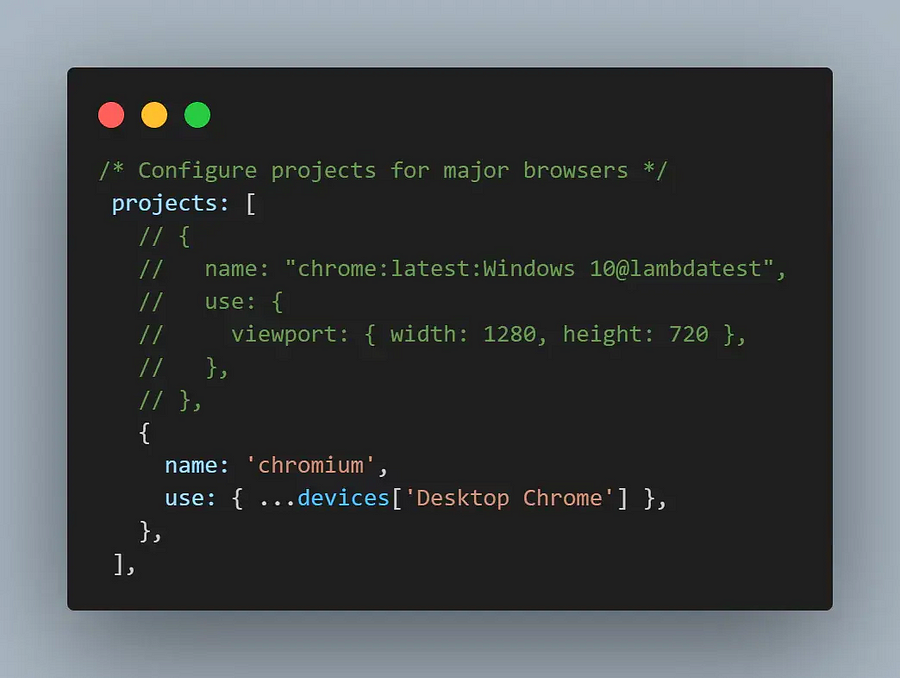
Let us now run the test locally first on Chromium. For that purpose, you need to enable Chromium in playwright.config.ts file in the project’s array.
Chromium is configured as a JSON object, as shown below:
You can now run the tests using the command:
npx playwright test –project=Chromium
Both the tests are passing successfully, and you can generate a detailed execution summary using the command.
npx playwright show-report
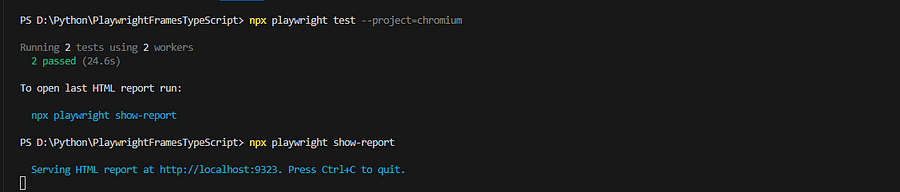
The summary view of the report looks like the one shown below and clearly shows the number of tests run, passed, failed, and skipped.

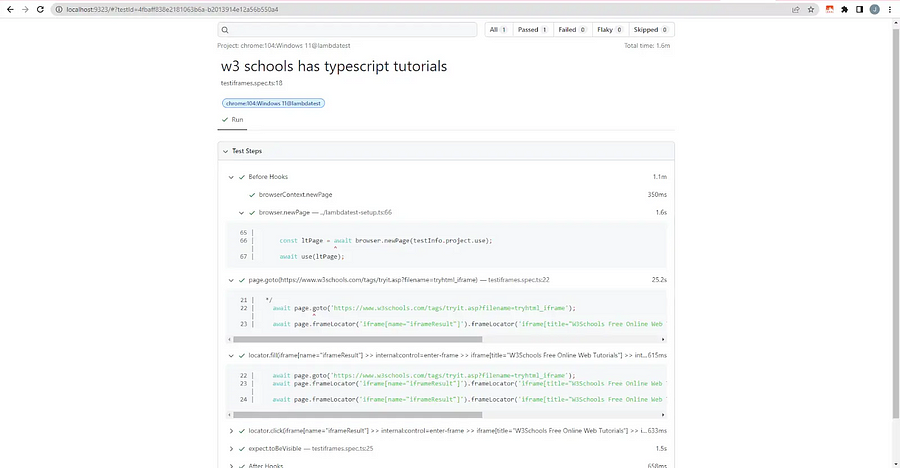
On clicking an individual test, you can see a more detailed view of the test execution in terms of the test steps and browser engine used.
Let us now look at the execution of the tests on a cloud grid such as LambdaTest. For that purpose, add two new files to your project.
The first file is called ‘.env’, which will store the username and access key required to access the cloud grid. The username and access key can be obtained from the password & security page of LambdaTest.
Add the username and access key to the .env file.
LT_USERNAME=<LT_USERNAME>
LT_ACCESS_KEY=<LT_ACCESS_KEY></LT_ACCESS_KEY>
To ensure that env variables are available for our tests, use the dotenv npm package. It can be installed using the npm install dotenv command.
This dotenv package reads the ‘.env’ file and exports the variables in it to be used in our code whenever needed using process.env.LT_USERNAME or process.env.LT_ACCESS_KEY. The general format remains process.env.< ENV_VARIABLE_NAME >.
The second file you need is the lambdatest-setup.ts. The naming of the file is for reference purposes. It can be named anything as per your preference. Here is what the complete file looks like.
FileName — lambdatest-setup.ts
/**
* Add the file in your test suite to run tests on LambdaTest.
* Import 'test' object from this file in the tests.
*/
import * as base from "@playwright/test";
import path from "path";
import { chromium } from "@playwright/test"
import dotenv from 'dotenv';
dotenv.config();
// LambdaTest capabilities
const capabilities = {
browserName: "Chrome", // Browsers allowed: 'Chrome', 'MicrosoftEdge', 'pw-chromium', 'pw-firefox' and 'pw-webkit'
browserVersion: "latest",
"LT:Options": {
platform: "Windows 10",
build: "Playwright TypeScript iframes",
name: "Playwright TypeScript iframes",
user: process.env.LT_USERNAME,
accessKey: process.env.LT_ACCESS_KEY,
network: true,
video: true,
console: true,
tunnel: false, // Add tunnel configuration if testing locally hosted webpage
tunnelName: "", // Optional
geoLocation: "US", // country code can be fetched from https://www.lambdatest.com/capabilities-generator/
},
};
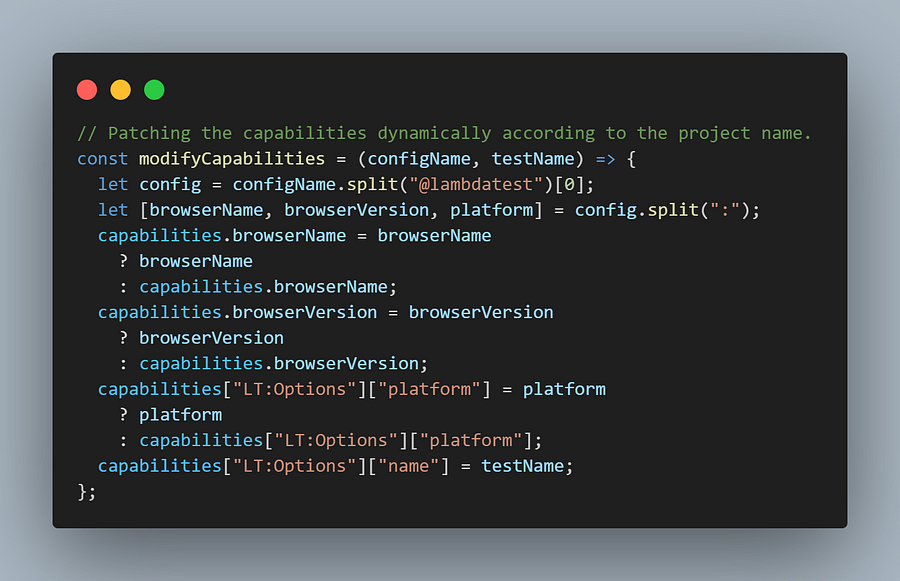
// Patching the capabilities dynamically according to the project name.
const modifyCapabilities = (configName, testName) => {
let config = configName.split("@lambdatest")[0];
let [browserName, browserVersion, platform] = config.split(":");
capabilities.browserName = browserName
? browserName
: capabilities.browserName;
capabilities.browserVersion = browserVersion
? browserVersion
: capabilities.browserVersion;
capabilities["LT:Options"]["platform"] = platform
? platform
: capabilities["LT:Options"]["platform"];
capabilities["LT:Options"]["name"] = testName;
};
const getErrorMessage = (obj, keys) =>
keys.reduce(
(obj, key) => (typeof obj == "object" ? obj[key] : undefined),
obj
);
const test = base.test.extend({
page: async ({ page, playwright }, use, testInfo) => {
// Configure LambdaTest platform for cross-browser testing
let fileName = testInfo.file.split(path.sep).pop();
if (testInfo.project.name.match(/lambdatest/)) {
modifyCapabilities(
testInfo.project.name,
'${testInfo.title} - ${fileName}'
);
const browser = await chromium.connect({
wsEndpoint: 'wss://cdp.lambdatest.com/playwright?capabilities=${encodeURIComponent(
JSON.stringify(capabilities)
)}',
});
const ltPage = await browser.newPage(testInfo.project.use);
await use(ltPage);
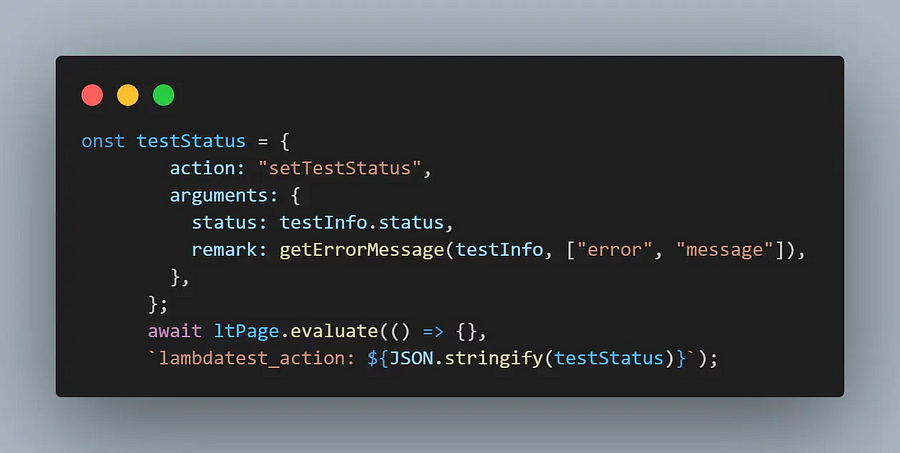
const testStatus = {
action: "setTestStatus",
arguments: {
status: testInfo.status,
remark: getErrorMessage(testInfo, ["error", "message"]),
},
};
await ltPage.evaluate(() => {},
'lambdatest_action: ${JSON.stringify(testStatus)}');
await ltPage.close();
// await browser.close();
} else {
// Run tests in local in case of local config provided
await use(page);
}
},
});
export default test;
Let us now understand the contents of the file step by step.
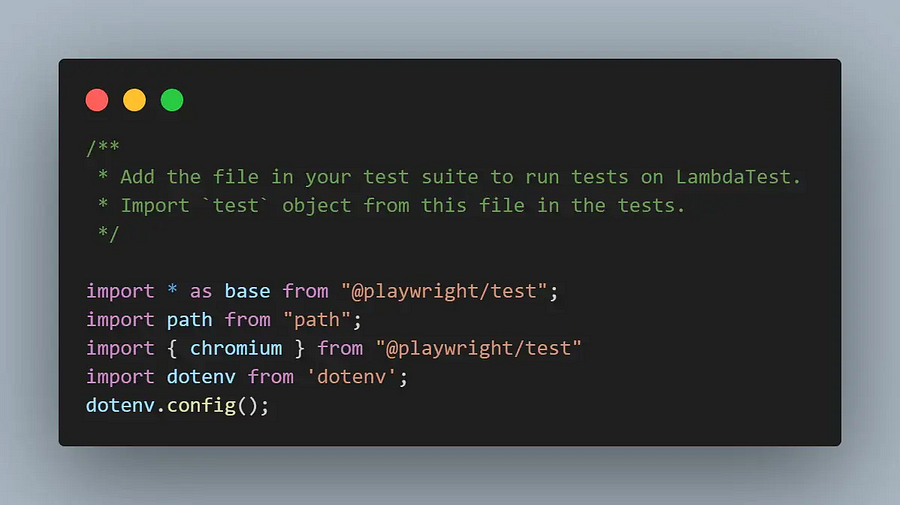
The first few lines in the files are the imports. The two notable imports are the Chromium browser engine from Playwright to support running the tests. The second is the dotenv package, which will help us convert the .env file to environment variables and use them in our code.
The dotenv.config() is the line that reads the ‘.env’ and exposes them as environment variables.
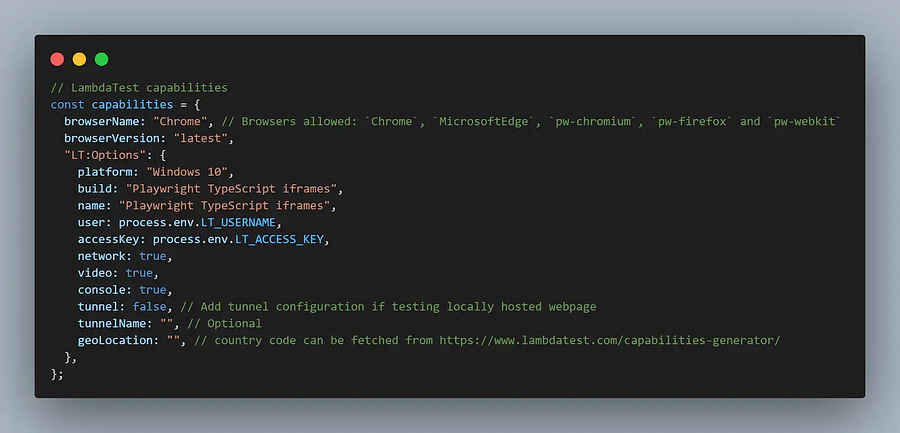
The JSON object capabilities are used to configure the behavior of the cloud grid and supply the username and access key.
The configuration we can make is setting the browserName, browserVersion, platform (operating system), enable or disable network and console logs and enable or disable execution video capture.
In the case of locally hosted websites, tunnel to the LambdaTest cloud grid can be also provisioned here.
The next part is configuring the operating system and the browser, which will be used when running the tests on the cloud grid.
A variety of options, such as Linux, macOS, and Windows are available in terms of operating system, and all modern browser engines are supported by LambdaTest cloud grid.
The final part is to override the base ‘Playwright/test’ method to make it compatible with connecting to the cloud grid and running tests. The complete method implementation is as below.
const test = base.test.extend({
page: async ({ page, playwright }, use, testInfo) => {
// Configure LambdaTest platform for cross-browser testing
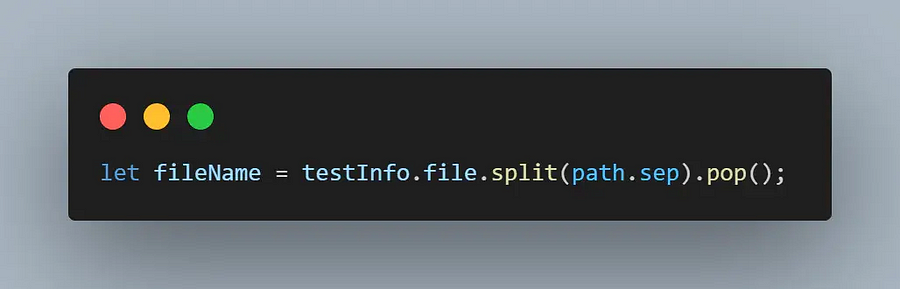
let fileName = testInfo.file.split(path.sep).pop();
if (testInfo.project.name.match(/lambdatest/)) {
modifyCapabilities(
testInfo.project.name,
'${testInfo.title} - ${fileName}'
);
const browser = await chromium.connect({
wsEndpoint: 'wss://cdp.lambdatest.com/playwright?capabilities=${encodeURIComponent(
JSON.stringify(capabilities)
)}',
});
const ltPage = await browser.newPage(testInfo.project.use);
await use(ltPage);
const testStatus = {
action: "setTestStatus",
arguments: {
status: testInfo.status,
remark: getErrorMessage(testInfo, ["error", "message"]),
},
};
await ltPage.evaluate(() => {},
'lambdatest_action: ${JSON.stringify(testStatus)}');
await ltPage.close();
// await browser.close();
} else {
// Run tests in local in case of local config provided
await use(page);
}
},
});
Let us understand the method in detail by doing a step-by-step walkthrough.
The testInfo is a special Playwright variable that contains information about the currently running test. Extract the name of the TypeScript file that contains the tests.
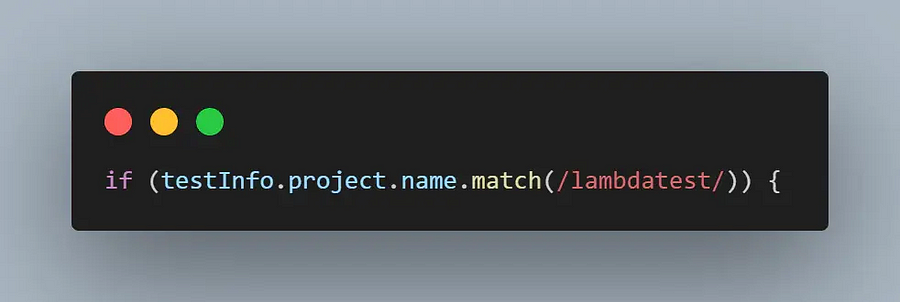
Next, use the testInfo to determine the name of the project, which is configured in the playwright.config.ts projects array. If the name contains the word ‘lambdatest’, then run the tests on the cloud grid else locally.
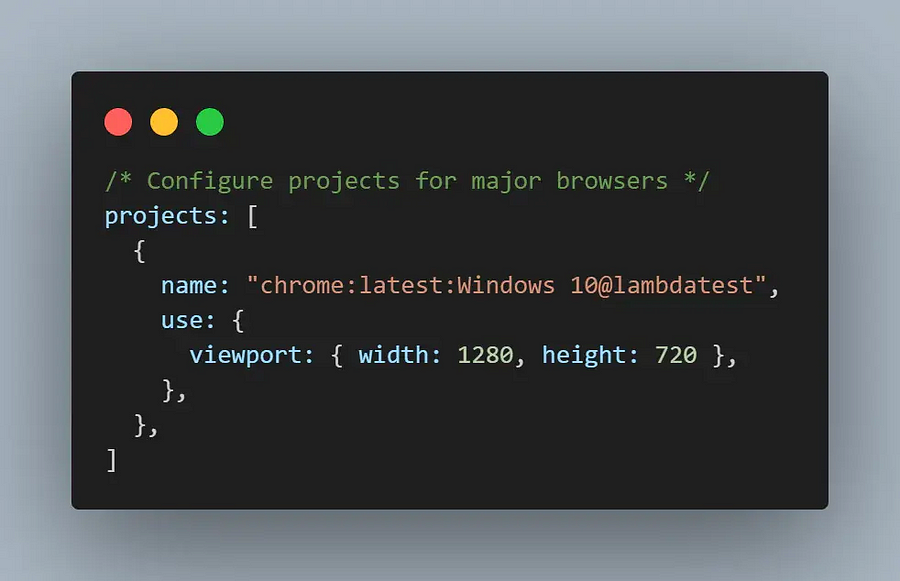
The snapshot below shows how the project’s array looks to run the tests on a cloud grid. We have configured the cloud grid to provide Windows 10 & Chrome latest version as the running environment.
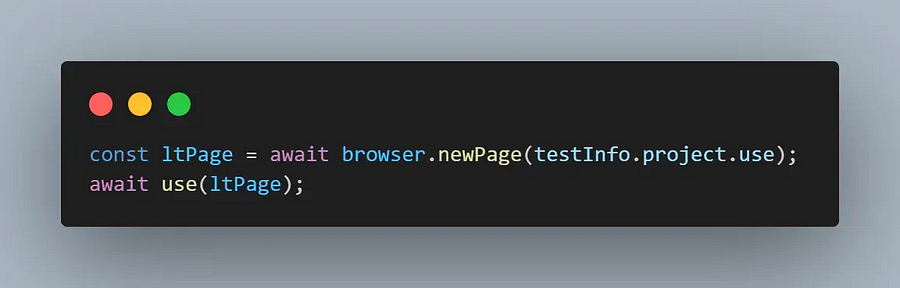
The connect method is used to supply the URL to connect to the cloud grid, and also provided to it is the capabilities object configured to run the tests and contains the username and access key. This returns a browser object.

Using the browser object, you can create a web page.
The testStatus method is used to set the test status i.e., either success or fail on the cloud grid.
In the file containing the test, we wrote testiframes.spec.ts. You can now import the test method. This is how the complete file looks now.
FileName — testiframes.spec.ts
import { expect } from '@playwright/test';
import test from "../lambdatest-setup";

test('has success message', async ({ page }, testInfo ) => {
  /*
  Test if demo email and demo name can be entered in the codepen form and select Gitlab as platform and click Submit.
  On submitting we should be able to verify the success message is displayed
  */
  await page.goto('https://codepen.io/getform/pen/jRoexL');
  await page.frameLocator('iframe[name="CodePen"]').getByPlaceholder('Enter email').fill('test@test.com');
  await page.frameLocator('iframe[name="CodePen"]').getByPlaceholder('Enter your name').fill('Test user');
  await page.frameLocator('iframe[name="CodePen"]').getByRole('combobox', { name: 'Favourite Platform' }).selectOption('Gitlab');
  await page.frameLocator('iframe[name="CodePen"]').getByRole('button', { name: 'Submit' }).click();
  await expect(page.frameLocator('iframe[name="CodePen"]').getByText('We received your submission, thank you!')).toBeVisible();
});

test('w3 schools has typescript tutorials', async ({ page }) => {
  /*
  Test if demo website has a search bar and we are able to search for TypeScript tutorials.
  */
    await page.goto('https://www.w3schools.com/tags/tryit.asp?filename=tryhtml_iframe');
    await page.frameLocator('iframe[name="iframeResult"]').frameLocator('iframe[title="W3Schools Free Online Web Tutorials"]').getByPlaceholder('Search our tutorials, e.g. HTML').fill('typescript');
    await page.frameLocator('iframe[name="iframeResult"]').frameLocator('iframe[title="W3Schools Free Online Web Tutorials"]').getByRole('button', { name: '' }).click();
    await expect(page.frameLocator('iframe[name="iframeResult"]').frameLocator('iframe[title="W3Schools Free Online Web Tutorials"]').getByRole('link', { name: 'Start learning TypeScript now »' })).toBeVisible();
});
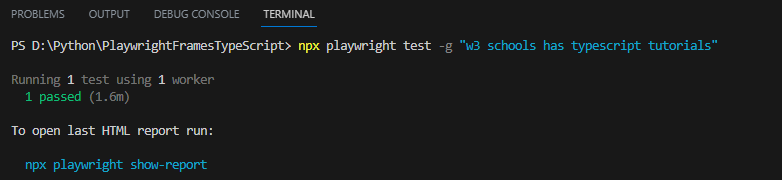
Since you have seen the execution of both tests locally and on the cloud grid, we will demo a single running of a single test, ‘w3 schools has typescript tutorials’.
Leveraging cloud grids provided by LambdaTest, an AI-powered test orchestration and execution platform, for running Playwright tests provide advantages such as scalability and availability of multiple operating systems and browsers to understand the test behavior on a wide range of test setups.
Run the command npx playwright test -g “w3 schools has typescript tutorials”.
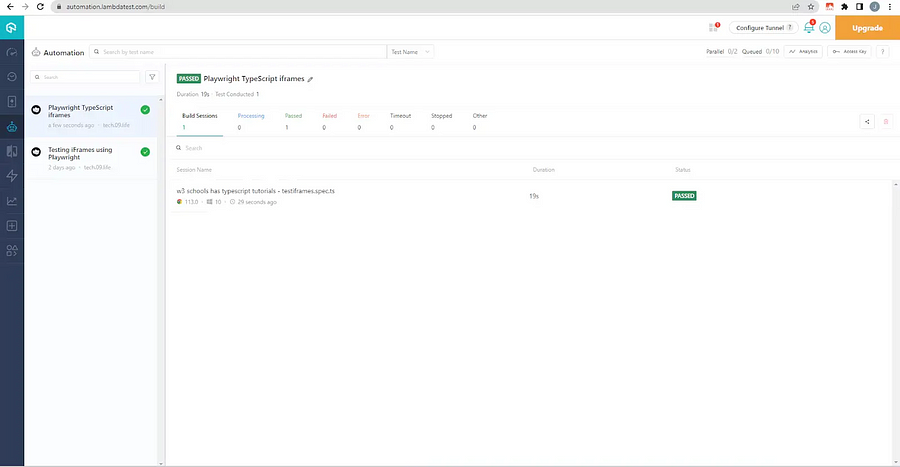
Here is how a successfully run test will look on the LambdaTest Dashboard.
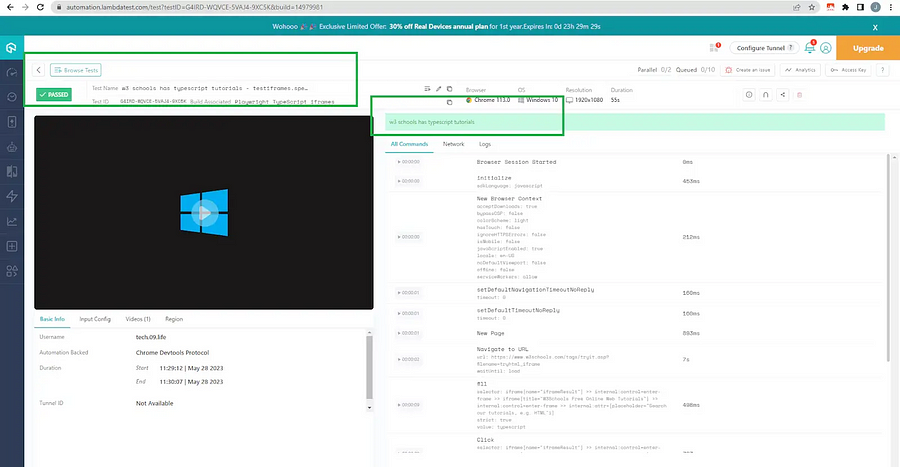
On clicking the test, we can also see a detailed view of the test, such as the execution video, the actionability logs, the operating system, and the browsers used.
The npx playwright show-report command also shows the details of the test execution as before.
This completes the execution of the test on the cloud grid.
Playwright automation is straightforward to grasp, requiring only fundamental knowledge of Python and TypeScript. If you’re interested in mastering test execution through Playwright automation, LambdaTest offers a complimentary Playwright 101 certification to enhance your automation testing abilities.
Conclusion
In this tutorial on handling iframes in Playwright, you have seen in detail how you can use Playwright to handle frames using its Python and TypeScript API. You have also had a look at what the use case is for frames and what is the distinction between the HTML tags frame and iframe.
Since HTML 5 iframe is the preferred way of embedding content from other websites into our own, you also learned how to embed a YouTube video within a custom-developed iframe.
Iframes in Playwright provide a convenient way of embedding content from other sources such as YouTube, Twitter, and Google, and even placing advertisements, their usage can provide better modularity to our website. Hence, reliably testing websites containing iframes is key to delivering a better user experience.
You also learned scenarios of nested iframes in Playwright, and you can test them using Python and TypeScript.
The execution of the tests was covered locally as well as on a cloud grid. The advantage of using a cloud grid for automation testing is that time and cost can be saved on setting up various cross platform and cross browser environments. All that is needed is a simple configuration setup, and the desired operating system and browser configuration are available for running the tests.
This provides more confidence to QA and Automation teams by ensuring that the user experience remains the same across different browsers and operating systems.